0%

使用国外VPS指南-Linode

选购VPS

  • 这里选择尝试使用Linode来做VPS,如果预算购的可以选择高配,一般可以选择Standard Linode plan10刀一月,我只选了Nanodes5刀一月,具体参数请查看它的官网,注册时可以提供这个推荐码ad40d846b4e9fcb9cec7a0f3e47fe553e8c2a27d有优惠.
  • 这里选择安装Debian 10,区域就选择SGJP,勾选Private IP还会有一个v4的IP,现在能供IPv4的厂商很少了,像Vultr最便宜的VPS是2.5刀一月,只提供IPv6.完成之后,控制台如下图:
    vps
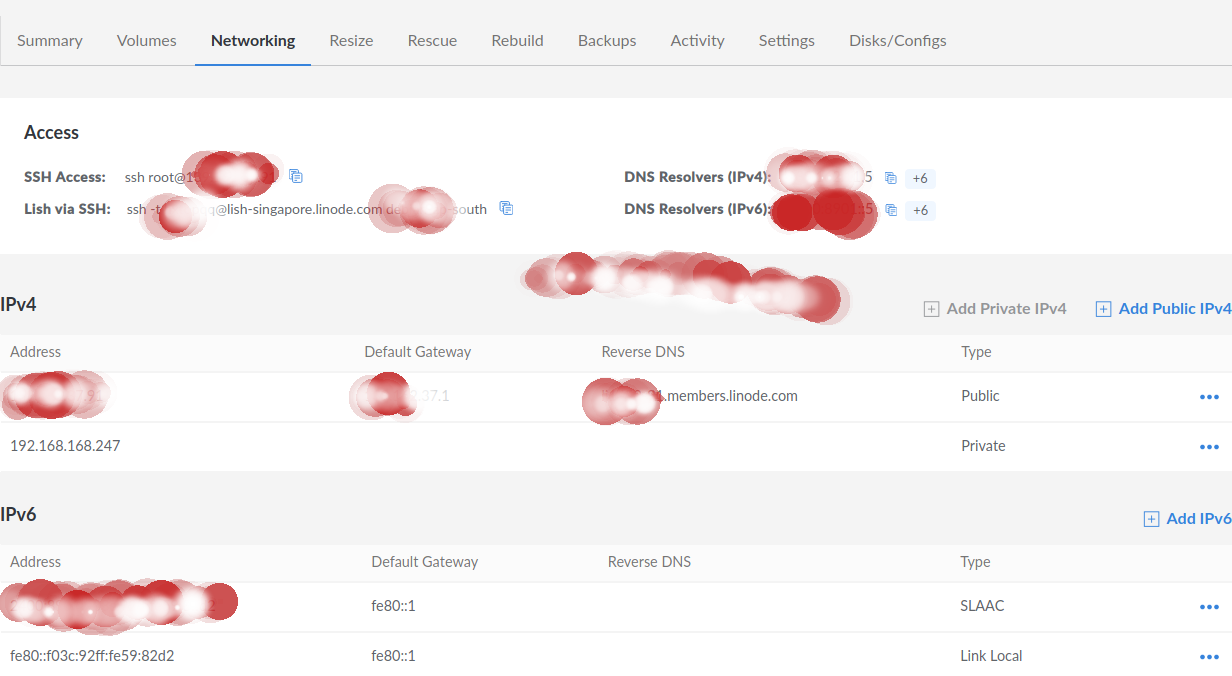
  • 就上面区域选择,理论上离自己近的访问会最快,但是我在实际应用中选择了一个SG很慢,这里在创建前可以使用https://www.linode.com/speed-test/测试一下,自己本地到Linode全球各机房的速度,选最快的.安装完成可以把VPS里的IP地址使用https://tools.ipip.net/traceroute.php检查一下路由,会在下方有直观的线路地图显示,如果发现IP的线路不满意删除重建一个新的VPS.
  • 登录它有两种SSH方式,一是直接SSH访问:ssh root@xxx.xxx.xxx.xxx,这里可以使用在布署时添加RSA证书验证免密访问.二是通过Lish访问,估计它像是一个串口重定向一样的:ssh -t <username>@lish-singapore.linode.com <host-tags>,这里要用[Linode](https://www.linode.com/?
    r=ad40d846b4e9fcb9cec7a0f3e47fe553e8c2a27d)的用户名与密码登录,后面再输入VPS的用户名与密码登入VPS.

开启SSH动态转发

1
2
3
4
~$ ssh -D 1088 -f -C -q -N user@<vps-ip>

~$ ps -ef | grep ssh
user 14609 1 0 23:32 ? 00:00:00 ssh -CfNq -D 1088 user@example.com
  • 开启ssh反向代理, 把本地的22端口反向映射到vps-ip:9980,这样访问9980就是访问到目标机的22端口。
1
~$ ssh -R 9980:localhost:22 -f -C -q -N user@<vps-ip>
  • 这里一般建议修改SSH服务器的默认端22为其它数字.,参数说明:
    • -D [bind_address:]port 监听本地端口与SSH服务器创建一条Socks5通道.
    • -C 开启数据压缩功能.
    • -ffork一个进程到后台模式,不会出现Shell.
    • -N 保持连接,端口转发中有用.
    • -q 安静模式,屏蔽一些警告与错误信息.

使用ngrok隧道

  • 去到ngrok官网下载一个二进制的客户端,使用ngrok有两个场景使用,一是可以在内网把本机的某一个端口通过ngrok服务映射出去,二是可以把你的VPS服务隐藏在ngrok服务后面,再用SSH去动态转发,每次运行ngrok都会得到一个动态域名与端口,相对来说,中动态安全。下面示例是把本机的22通过ngrok
1
2
3
4
5
6
~$ ngrok tcp 22
Try our new native Go library: https://github.com/ngrok/ngrok-go
[...]
Web Interface http://127.0.0.1:4040
Forwarding tcp://8.tcp.ngrok.io:19192 -> localhost:22

  • 再用ssh动态转发,这样就把自已的vps隐藏,并且还加速了,有很多直接SSHVPS速度比较慢的。
1
~$ ssh -D 1080  user@8.tcp.ngrok.io  -p 19192

申请Let's Ecrypt证书

  • Linode API参考

  • lego Let’s Encrypt client and ACME library written in Go

  • 这里会使用lego工具通过DNS认证申请一个安全证书。

创建Access Token

  • 进入到Cloud Manager -> My Profile -> API Tokens创建,具体可以参照这里

使用LEGO申请

1
2
3
~$ git clone https://github.com/go-acme/lego
~$ cd lego
~$ make build
  • 使用dns方式,申请成功后,默认会在~/.lego/certificates有相关域名的证书文件。
1
~$ LINODE_TOKEN=<your token api>  lego --email <your email>@mail.com --dns linode --domains <linode name>.members.linode.com --tls run

通过acme.sh申请

  • acmesh-official/acme.sh

  • Secure a Website or Domain with Let’s Encrypt and acme.sh

  • 客户在申请Let’s Encrypt证书的时候,需要校验域名的所有权,证明操作者有权利为该域名申请证书,目前支持三种验证方式:

    • dns-01:给域名添加一个DNS TXT记录。
    • http-01:在域名对应的Web服务器下放置一个HTTP well-known URL资源文件。
    • tls-sni-01:在域名对应的Web服务器下放置一个HTTPS well-known URL资源文件。
  • 而申请通配符证书,只能使用dns-01的方式.

  • acme.sh是一个纯粹用Shell(Unix shell)语言编写的ACME协议客户端。完整的ACME协议实施。支持 ACME v1ACME v2,ACME v2支持通配符证书。并且无需root/sudoer的访问权限 。支持在Docker内使用,支持IPv6

1
2
~$ curl  https://get.acme.sh | sh
~$ echo "alias acme.sh=~/.acme.sh/acme.sh" >> ~/.bashrc

申请证书

  • 使用dns的验证方式,如果提示要一个email,需要加上--register-account -m <you email>@mail.com
1
2
~$ export LINODE_V4_API_KEY="<you linode api token >"
~$ acme.sh --issue --dns dns_linode_v4 --dnssleep 90 --debug -d <linode-name>.members.linode.com
  • 使用http的验证方式,这里没有安装任何web服务器,使用了socat工具与--standalone方式。申请成功后,会在~/.wwwroot/<linode-name>.members.linode.com目录下有相关的证书文件。

    1
    2
    3
    4
    5
    ~$ apt-get install socat
    ~$ ETH0_IPv4=`ip addr show dev eth0 | grep "inet" | head -n1 | awk '{print $2}' | awk -F '/' '{print $1}'`
    ~$ DOMAIN=`dig -x ${ETH0_IPv4} | grep "PTR" | grep -v '^;' | awk '{print $5}'`
    ~$ DOMAIN=`echo ${DOMAIN%?}`
    ~$ acme.sh --issue --standalone -d ${DOMAIN} --webroot ~/.wwwroot/${DOMAIN}
  • 安装自动刷新证书脚本定时任务

1
2
3
4
5
6
7
root@localhost:~# acme.sh --upgrade --auto-upgrade
[Sun 28 Aug 2022 01:46:57 PM UTC] Already uptodate!
[Sun 28 Aug 2022 01:46:57 PM UTC] Upgrade success!

root@localhost:~# crontab -l
26 0 * * * "/root/.acme.sh"/acme.sh --cron --home "/root/.acme.sh" > /dev/null

  • 安装证书,以Nginx的证书加载位置为例。它会通过脚本复制证书文件到指定的目录下。

    1
    2
    3
    4
    5
    6
    7
    8
    9
    10
    11
    12
    ~$ cat >install_nginx_ssl.sh<<EOF

    #!/bin/bash

    domain=exmaple.com
    headscale_dir=/etc/nginx/ssl/${domain}_ecc
    [[ ! -d ${headscale_dir} ]] && mkdir -pv ${headscale_dir}
    /root/.acme.sh/acme.sh --install-cert -d ${domain} \
    --key-file ${headscale_dir}/${domain}.key \
    --fullchain-file ${headscale_dir}/fullchain.cer \
    --reloadcmd "service nginx force-reload"
    EOF
  • 如果上述出现任何错误,无法申请到证书,需要先确定是否本机的防火墙阻止了80,443的端口,或者指定一个其它的端口。

安装HeadScale

headscale-ui相关

源码安装

1
2
~$ git clone https://github.com/juanfont/headscale
~$ cd headscale && make build

Docker运行

1
2
3
4
5
6
7
8
9
10
11
12
13
14
15
16
17
18
19
20
21
22
23
24
25
26
27
28
~$ ~/headscale$ tree
.
├── config
│   ├── config.yaml
│   ├── db.sqlite
│   ├── noise_private.key
│   └── private.key
├── data
└── docker-compose.yml

~/headscale$ cat docker-compose.yml
version: '3.5'
services:
headscale:
image: headscale/headscale:latest
volumes:
- ./config:/etc/headscale/
- ./data:/var/lib/headscale
ports:
- 8080:8080
command: headscale serve
restart: unless-stopped
headscale-ui:
image: ghcr.io/gurucomputing/headscale-ui:latest
restart: unless-stopped
container_name: headscale-ui
ports:
- 9443:443
  • headscale-ui创建一个可以访问的Api Key. 打开https://headscale.example.com/web输入下面的值串。
1
2
~$ docker exec headscale-<docker> headscale apikeys create
dfjz2unKKA.N1zeAPfMIUDJWYDgaOtIX6pk1hzxxxxxxxxxxx
  • config.yaml模版来自与这里
1
2
3
4
5
6
7
8
9
10
11
12
13
14
15
16
17
18
19
20
21
22
23
24
25
26
27
28
29
30
31
32
33
34
35
36
37
38
39
40
41
42
43
44
45
46
47
48
49
50
51
52
53
54
55
vpsuser@localhost:~/headscale$ grep -v '^#\|^    #\|^  #\|^$' config/config.yaml
---
server_url: https://headscale.example.com:443
listen_addr: 0.0.0.0:8080
metrics_listen_addr: 127.0.0.1:9090
grpc_listen_addr: 127.0.0.1:50443
grpc_allow_insecure: false
private_key_path: ./private.key
noise:
private_key_path: ./noise_private.key
ip_prefixes:
- fd7a:115c:a1e0::/48
- 100.64.0.0/10
derp:
server:
enabled: false
region_id: 999
region_code: "headscale"
region_name: "Headscale Embedded DERP"
stun_listen_addr: "0.0.0.0:3478"
urls:
- https://controlplane.tailscale.com/derpmap/default
paths: []
auto_update_enabled: true
update_frequency: 24h
disable_check_updates: false
ephemeral_node_inactivity_timeout: 30m
node_update_check_interval: 10s
db_type: sqlite3
db_path: ./db.sqlite
acme_url: https://acme-v02.api.letsencrypt.org/directory
acme_email: ""
tls_letsencrypt_hostname: ""
tls_letsencrypt_cache_dir: ./cache
tls_letsencrypt_challenge_type: HTTP-01
tls_letsencrypt_listen: ":http"
tls_cert_path: ""
tls_key_path: ""
log:
format: text
level: info
acl_policy_path: ""
dns_config:
override_local_dns: false
nameservers:
- 1.1.1.1
domains: []
magic_dns: false // 不要开启,它会修改本机的/etc/resolve.conf
base_domain: example.com
unix_socket: ./headscale.sock
unix_socket_permission: "0770"
logtail:
enabled: false
randomize_client_port: false

  • 创建用户
1
2
~$ headscale users create vps1
~$ headscale users create vps2
  • 查看
1
2
3
4
5
6
7
8
9
~$ docker exec headscale-headscale-1 headscale   users list
ID | Name | Created
1 | vps1 | 2023-02-01 08:34:30
2 | vps2 | 2023-02-01 08:34:34
3 | vps3 | 2023-02-03 15:51:40
4 | vps5 | 2023-02-24 08:54:40
5 | vps6 | 2023-02-24 09:05:33
6 | vps7 | 2023-02-25 07:29:03

  • 查看路由
1
2
3
4
5
6
7
8
9
10
~$ docker exec headscale-headscale-1 headscale routes list
An updated version of Headscale has been found (0.22.0-alpha2 vs. your current 0.21.0). Check it out https://github.com/juanfont/headscale/releases
ID | Machine | Prefix | Advertised | Enabled | Primary
1 | | 192.168.10.0/24 | false | false | false
2 | | 10.0.0.0/24 | false | false | false
3 | debian-xyz97cy4 | 192.168.1.0/24 | false | false | false
4 | debian | 10.0.0.0/24 | true | true | true
5 | xx-debian | 10.0.0.0/24 | false | false | false
6 | xx-debian | 0.0.0.0/0 | true | false | -
7 | xx-debian | ::/0 | true | false | -
  • 查看要结点列表。
1
2
3
4
5
6
7
8
9
10
11
12
13
14
~$ docker exec headscale-headscale-1 headscale nodes list
An updated version of Headscale has been found (0.22.0-alpha2 vs. your current 0.21.0). Check it out https://github.com/juanfont/headscale/releases
ID | Hostname | Name |MachineKey| NodeKey | User | IP addresses | Ephemeral | Last seen | Expiration | Online | Expired
2 | debian | debian-xyz9 | [8uJXG] | [5H4BE] | vps2 | 100.64.0.2, fd7a:115c:b1e0::2 | false | 2023-04-15 13:57:53 | 0001-01-01 00:00:00 | online | no
3 | debian | debian-sbsb | [62pMK] | [6Dz24] | vps3 | 100.64.0.3, fd7a:115c:b1e0::3 | false | 2023-02-10 03:48:02 | 0001-01-01 00:00:00 | offline | no
4 | debian | debian-d9l5 | [N81bK] | [z5uBc] | vps3 | 100.64.0.4, fd7a:115c:b1e0::4 | false | 2023-04-15 13:57:57 | 0001-01-01 00:00:00 | online | no
5 | Galaxy A9 | galaxy-a9-2 | [J+Qwv] | [KPeSZ] | vps5 | 100.64.0.5, fd7a:115c:b1e0::5 | false | 2023-03-28 04:00:16 | 0001-01-01 00:00:00 | offline | no
7 | DESKTOP-VO| desktop-6pr | [tujxu] | [WmkOH] | winhome | 100.64.0.7, fd7a:115c:b1e0::7 | false | 2023-04-08 07:43:34 | 0001-01-01 00:00:00 | offline | no
8 | 51-debian | 51-debian | [JIXKw] | [aCF/i] | build | 100.64.0.8, fd7a:115c:b1e0::8 | false | 2023-04-15 13:58:16 | 0001-01-01 00:00:00 | online | no
9 | debian | debian | [q6B+J] | [tNRfk] | vps1 | 100.64.0.1, fd7a:115c:b1e0::1 | false | 2023-04-15 13:58:17 | 0001-01-01 00:00:00 | online | no
10 | pine64 | pine64 | [Qz+wP] | [ooL1m] | vps2 | 100.64.0.9, fd7a:115c:b1e0::9 | false | 2023-03-20 12:03:20 | 0001-01-01 00:00:00 | offline | no
11 | pine64 | pine64-qpos | [BFqoJ] | [9e/fx] | pine64 | 100.64.0.10, fd7a:115c:b1e0::a | false | 2023-03-21 15:43:39 | 0001-01-01 00:00:00 | offline | no
12 | pine64 | pine64-7rj4 | [TyQ60] | [sv+cn] | pine64 | 100.64.0.11, fd7a:115c:b1e0::b | false | 2023-04-15 13:57:51 | 0001-01-01 00:00:00 | online | no
13 | debian | debian-yaia | [T4D+u] | [JHtyJ] | mini | 100.64.0.12, fd7a:115c:b1e0::c | false | 2023-04-15 10:10:43 | 0001-01-01 00:00:00 | offline | no

安装Tailscale

源码编译Linux

  • Linux amd64

    1
    2
    3
    4
    5
    ~$ git clone https://github.com/tailscale/tailscale
    ~$ cd tailscale
    ~$ GOOS=linux GOARCH=amd64 ./tool/go install tailscale.com/cmd/tailscale tailscale.com/cmd/tailscaled
    ~$ GOOS=linux GOARCH=amd64 ./tool/go build -o ./dist tailscale.com/cmd/tailscale tailscale.com/cmd/tailscaled

  • Linux arm32

1
~$ GOOS=linux GOARCH=arm GOARM=7 ./tool/go build -o ./dist  tailscale.com/cmd/tailscale tailscale.com/cmd/tailscaled

运行

  • 直接命令行运行,先要让tailscaled进程运行起来。
1
~$ sudo tailscaled --state=/var/lib/tailscale/tailscaled.state --socket=/run/tailscale/tailscaled.sock --port=41641  -no-logs-no-support
  • 也可以使用systemd服务,在tailscale/cmd/tailscaled目录下有各种服务的模版文件,如:tailscaled.openrc,tailscaled.service,tailscaled.defaults等。

  • 复制tailscaled默认参数配置

1
2
3
4
~$ grep -v '^#\|^$' /etc/default/tailscaled
PORT="41641"
FLAGS="-no-logs-no-support"

  • 具体的进程服务的配置文件如下:
1
2
3
4
5
6
7
8
9
10
11
12
13
14
15
16
17
18
19
20
21
22
23
24
25
~$ cat /etc/systemd/system/tailscaled.service
[Unit]
Description=Tailscale node agent
Documentation=https://tailscale.com/kb/
Wants=network-pre.target
After=network-pre.target NetworkManager.service systemd-resolved.service

[Service]
EnvironmentFile=/etc/default/tailscaled
ExecStartPre=/usr/sbin/tailscaled --cleanup
ExecStart=/usr/sbin/tailscaled --state=/var/lib/tailscale/tailscaled.state --socket=/run/tailscale/tailscaled.sock --port=${PORT} $FLAGS
ExecStopPost=/usr/sbin/tailscaled --cleanup

Restart=on-failure

RuntimeDirectory=tailscale
RuntimeDirectoryMode=0755
StateDirectory=tailscale
StateDirectoryMode=0700
CacheDirectory=tailscale
CacheDirectoryMode=0750
Type=notify

[Install]
WantedBy=multi-user.target

登录服务器

  • 这里运行登录,会在终端输出一行参数的提示,或者会自动打开本地浏览器,输出一段参数,需要在headscale上去运行。
1
~$ sudo tailscale up --login-server <your server url or ip:port>
  • 上面运行输出的参数,需要在headscale的服务器上运行。
1
~$ sudo headscale --user vps1 nodes register  --key nodekey:ee91f2883a532cff2ea63991cfxxxxx
  • 如果headscale是运行在docker里的,需要把命令传入到docker.
1
~$ docker exec headscale-<docker> headscale nodes register --user vps1 --key nodekey:ee91f2883a532cff2ea63991cfxxxxx
  • 重新登录
1
2
3
4
5
6
~$ sudo tailscale logout
~$ sudo tailscale up --operator=$USER --login-server=https://headscale.example.com
To authenticate, visit:

https://headscale.example.com:443/register/nodekey:0a101ba73ba0ad5ab17984da614e7d52c8089d298429534713baxxxxxxxxx

  • 另一种登录方式,先在headscale上,为一个用户生成preauthkeys,再拿这一串key到客户端进行登录
1
2
~$ docker exec headscale-headscale-1 headscale --user vps2 preauthkeys create --reusable --expiration 24h
e770e03d374e667134de22b8ccxxxxxx
  • 去某一个客户端机器登录认证。
1
~$ sudo tailscale up --login-server https://headscale.example.com --authkey e770e03d374e667134de22b8ccxxxxxx
  • 测试与对端是否是p2p直连
1
2
3
4
5
6
7
8
9
10
11
12
13
~$ tailscale ping 100.64.0.1
pong from debian (fd7a:115c:a1e0::1) via DERP(hkg) in 346ms
pong from debian (fd7a:115c:a1e0::1) via DERP(tok) in 2.671s
pong from debian (fd7a:115c:a1e0::1) via DERP(tok) in 483ms
pong from debian (fd7a:115c:a1e0::1) via DERP(hkg) in 347ms
pong from debian (fd7a:115c:a1e0::1) via DERP(hkg) in 346ms
pong from debian (fd7a:115c:a1e0::1) via DERP(hkg) in 345ms
pong from debian (fd7a:115c:a1e0::1) via DERP(hkg) in 343ms
pong from debian (fd7a:115c:a1e0::1) via DERP(tok) in 1.62s
direct connection not established

  • 检测网络状态
1
2
3
4
5
6
7
8
9
10
11
12
13
14
15
16
17
18
19
20
21
22
23
24
25
26
27
28
29
30
31
32
33
34
35
36
37
~$ tailscale netcheck

Report:
* UDP: true
* IPv4: yes, 120.235.xxx.157:42608
* IPv6: yes, [2409:xxx:2418:b130:xxx:3815:55ca:xxx]:6886
* MappingVariesByDestIP: false
* HairPinning: false
* PortMapping:
* CaptivePortal: false
* Nearest DERP: Hong Kong
* DERP latency:
- hkg: 74.6ms (Hong Kong)
- sin: 132.2ms (Singapore)
- tok: 152ms (Tokyo)
- syd: 155.4ms (Sydney)
- sea: 221.2ms (Seattle)
- lax: 223.3ms (Los Angeles)
- sfo: 233ms (San Francisco)
- lhr: 233.1ms (London)
- ams: 236.6ms (Amsterdam)
- den: 244.3ms (Denver)
- ord: 248.2ms (Chicago)
- dfw: 251.7ms (Dallas)
- blr: 252.3ms (Bangalore)
- par: 255ms (Paris)
- fra: 255.2ms (Frankfurt)
- waw: 260.5ms (Warsaw)
- tor: 264.9ms (Toronto)
- hnl: 266.4ms (Honolulu)
- mia: 275.1ms (Miami)
- dbi: 275.5ms (Dubai)
- nyc: 277.4ms (New York City)
- mad: 287.6ms (Madrid)
- sao: 368ms (São Paulo)
- jnb: 424.2ms (Johannesburg)

  • 不修改本地/etc/resolv.conf.
1
~$ tailscale set --accept-dns=false
  • 查看本地路由
1
2
3
4
5
6
7
8
~$ ip route show table 52
100.64.0.1 dev tailscale0
100.64.0.3 dev tailscale0
100.64.0.4 dev tailscale0
100.64.0.5 dev tailscale0
100.64.0.6 dev tailscale0
100.64.0.7 dev tailscale0
[...]

打通局域网访问

  • 首先需要在开放访问的局域网的机器上开启内核路由转发
1
2
3
echo 'net.ipv4.ip_forward = 1' | tee /etc/sysctl.conf
echo 'net.ipv6.conf.all.forwarding = 1' | tee -a /etc/sysctl.conf
sysctl -p
  • 在注册启动节点时加入--advertise-routes=xxx.xx.xx.x/xx通告声明本局域网的路由
1
~$ tailscale up --login-server=https://headscale.example.com --accept-dns=false --advertise-routes=10.0.1.0/24 --reset
  • headscale查看并开启相应的路由

    1
    2
    3
    4
    5
    6
    7
    8
    9
    10
    ~$ docker exec headscale-headscale-1 headscale routes list
    An updated version of Headscale has been found (0.22.0-alpha2 vs. your current 0.21.0). Check it out https://github.com/juanfont/headscale/releases
    ID | Machine | Prefix | Advertised | Enabled | Primary
    1 | | 192.168.10.0/24 | false | false | false
    2 | | 10.0.0.0/24 | false | false | false
    3 | debian-xyz97cy4 | 192.168.1.0/24 | false | false | false
    4 | debian | 10.0.1.0/24 | true | false | true
    5 | xx-debian | 10.0.1.0/24 | false | false | false
    6 | xx-debian | 0.0.0.0/0 | true | false | -
    7 | xx-debian | ::/0 | true | false | -
  • 如上图所示,第4行Enabled显示是false,这里需要开启它。

1
2
3
4
5
6
~$ docker exec headscale-headscale-1 headscale routes enable -r 4

~$ docker exec headscale-headscale-1 headscale routes list
[...]
4 | debian | 10.0.1.0/24 | true | true | true
[...]
  • 去其它节点本看路由结果,节点启时需要加入--accept-routes=true才能。
1
2
3
~$ sudo tailscale up --login-server https://headscale.example.com --accept-routes=true
~$ ip route show table 52|grep "10.0.1.0/24"
10.0.1.0/24 dev tailscale0
  • 上面的节点启动连接成功后,就可以直接在本地访问对端10.0.1.0/24网络。如下面,则时两个子局域通过各自网络的一台机器,把两个局域网连通起来。
1
2
3
4
# A局域网的一台机器。
~$ tailscale up --accept-routes=true --accept-dns=false --advertise-routes=192.168.1.0/24
# B局域网的一台机器。
~$ tailscale up --accept-routes=true --accept-dns=false --advertise-routes=192.168.2.0/24

设置exit-node.

  • 首先需要一台机器在注册启动节点时加入--advertise-exit-node声明它提供节点出口服务。已经注册的可以命名用下面命令:

    1
    ~$  sudo tailscale set --advertise-exit-node
  • 需要在headscale中开启0.0.0.0/0,::/0路由,

1
2
3
~$ docker exec headscale-headscale-1 headscale routes enable -r 6
~$ docker exec headscale-headscale-1 headscale routes enable -r 7

  • 查看路由
1
2
3
4
5
6
7
8
9
~$ docker exec headscale-headscale-1 headscale routes list
ID | Machine | Prefix | Advertised | Enabled | Primary
1 | | 192.168.10.0/24 | false | false | false
2 | | 10.0.0.0/24 | false | false | false
3 | debian-xyz97cy4 | 192.168.1.0/24 | false | false | false
4 | debian | 10.0.0.0/24 | true | true | true
5 | xx-debian | 10.0.0.0/24 | true | false | false
6 | xx-debian | 0.0.0.0/0 | true | true | -
7 | xx-debian | ::/0 | true | true | -
  • 其它节点,设置使用exit-node做为出口路由
1
~$ sudo tailscale up --login-server https://headscale.example.com  --exit-node=100.64.0.8
  • 或者
1
~$ sudo tailscale set --exit-node xx-debian
  • 退出使用exit-node出口路由
1
~$ sudo tailscale set --exit-node ""

Windows客户端

Android客户端

  • tailscale-android的安卓端,可以从源码编译,可以从F-Droid或者从Google Play两个市场上安装。

  • 1.29.1开始可以支持custom server,它的入口比较了隐蔽,需点击右上角的三的个点,查看三次about,第四次才会出现这更改服务器的菜单。登录注册流程与Linux类似。

安装Trojan

  • trojan是一个代理上网工具,能帮助学习到更全面的知识,同时它的服务请求是通过标准的SSL(443)通讯的.对于新手可以去到Github找一键安装脚本,有动手能力的可以自己编译源码与配置.

网络性能优化

1
2
3
4
5
6
7
8
9
10
11
12
13
14
15
16
17
18
19
20
21
22
23
24
25
26
27
28
29
30
31
32
33
34
35
36
37
38
39
40
41
42
43
44
45
46
47
48
49
50
51
52
53
54
55
56
~$ vi /etc/security/limits.conf

# 打开文件,添加下面的行.

* soft nofile 1048576
* hard nofile 1048576

# for server running in root:
root soft nofile 1048576
root hard nofile 1048576

~$ sudo cat > '/etc/sysctl.d/99-sysctl.conf' << EOF
net.ipv4.ip_forward=1
net.ipv4.conf.all.rp_filter = 1
# Overrule forwarding behavior. Accept Router Advertisements
net.ipv6.conf.all.accept_ra = 2
# max open files
fs.file-max = 1048576
# max read buffer
net.core.rmem_max = 67108864
# max write buffer
net.core.wmem_max = 67108864
# default read buffer
net.core.rmem_default = 65536
# default write buffer
net.core.wmem_default = 65536
# max processor input queue
net.core.netdev_max_backlog = 409600
# max backlog
net.core.somaxconn = 4096
# resist SYN flood attacks
net.ipv4.tcp_syncookies = 1
# reuse timewait sockets when safe
net.ipv4.tcp_tw_reuse = 1
# short FIN timeout
net.ipv4.tcp_fin_timeout = 30
# short keepalive time
net.ipv4.tcp_keepalive_time = 1200
# outbound port range
net.ipv4.ip_local_port_range = 6000 65535
# max timewait sockets held by system simultaneously
net.ipv4.tcp_max_tw_buckets = 5000
# turn on TCP Fast Open on both client and server side
net.ipv4.tcp_fastopen = 3
# TCP receive buffer
net.ipv4.tcp_rmem = 4096 87380 67108864
# TCP write buffer
net.ipv4.tcp_wmem = 4096 65536 67108864
# turn on path MTU discovery
net.ipv4.tcp_mtu_probing = 1
net.ipv4.tcp_slow_start_after_idle = 0
net.ipv4.tcp_max_syn_backlog = 12800
net.core.default_qdisc=fq
net.ipv4.tcp_congestion_control=bbr
EOF
~$ sudo sysctl -p

申请证书Let's Encrypt

  • 这里使用一个简单脚本获取

    1
    2
    3
    4
    5
    6
    ~$ sudo apt-get install certbot dnsutils  python-certbot-nginx -y
    ~$ ETH0_IPv4=`ip addr show dev eth0 | grep "inet" | head -n1 | awk '{print $2}' | awk -F '/' '{print $1}'`
    ~$ DOMAIN=`dig -x ${ETH0_IPv4} | grep "PTR" | grep -v '^;' | awk '{print $5}'`
    ~$ DOMAIN=`echo ${DOMAIN%?}`
    ~$ certbot certonly --nginx --agree-tos --email yjdwbj@gmail.com -d $DOMAIN
    ~$ apt-get autoremove nginx-full -y # 这里没有用到nginx,删除它.
  • 申请成功后,查看证书.

    1
    2
    ~# ls/etc/letsencrypt/live/<xxxxx>.members.linode.com
    cert.pem chain.pem fullchain.pem privkey.pem README

部署Trojan

  • 这里就直接下载一个最新的Release解压使使用,解压后如下:

    1
    2
    3
    4
    5
    6
    7
    8
    9
    10
    11
    12
    13
    ~# tree trojan
    trojan
    ├── config.json
    ├── CONTRIBUTORS.md
    ├── examples
    │   ├── client.json-example
    │   ├── forward.json-example
    │   ├── nat.json-example
    │   ├── server.json-example
    │   └── trojan.service-example
    ├── LICENSE
    ├── README.md
    └── trojan
  • 这里直接从examples/server.json-example复制一个改名成server.json,具体修改的位置如下:

    1
    2
    3
    4
    5
    6
    7
    8
    9
    10
    11
    12
    13
    14
    15
    16
    17
    18
    19
    20
    21
    22
    23
    24
    25
    26
    27
    28
    29
    30
    31
    32
    33
    34
    35
    36
    37
    38
    39
    40
    41
    42
    43
    44
    45
    46
    47
    48
    49
    50
    # cat server.json
    {
    "run_type": "server", # 如果是用客户端,改成client
    "local_addr": "0.0.0.0",
    "local_port": 443,
    "remote_addr": "127.0.0.1",
    "remote_port": 80,
    "password": [
    "passwd1", # 可以设置多个密码,可以使用任意一个访问该服务.
    "passwd2"
    ],
    "log_level": 1,
    "ssl": {
    # 下面这两行,就是使用从letsencrypt申请到的证书的完全路径.
    "cert": "/etc/letsencrypt/live/<xxxxxx>.members.linode.com/fullchain.pem",
    "key":"/etc/letsencrypt/live/<xxxxx>.members.linode.com/privkey.pem",
    "key_password": "",
    "cipher": "ECDHE-ECDSA-AES128-GCM-SHA256:ECDHE-RSA-AES128-GCM-SHA256:ECDHE-ECDSA-AES256-GCM-SHA384:ECDHE-RSA-AES256-GCM-SHA384:ECDHE-ECDSA-CHACHA20-POLY1305:ECDHE-RSA-CHACHA20-POLY1305:DHE-RSA-AES128-GCM-SHA256:DHE-RSA-AES256-GCM-SHA384",
    "cipher_tls13": "TLS_AES_128_GCM_SHA256:TLS_CHACHA20_POLY1305_SHA256:TLS_AES_256_GCM_SHA384",
    "prefer_server_cipher": true,
    "sni": "yourdomain", //如果客户端,会有这一行,就是服务器的域名.
    "alpn": [
    "h2",
    "http/1.1"
    ],
    "reuse_session": true,
    "session_ticket": false,
    "session_timeout": 600,
    "plain_http_response": "",
    "curves": "",
    "dhparam": ""
    },
    "tcp": {
    "prefer_ipv4": false,
    "no_delay": true,
    "keep_alive": true,
    "reuse_port": true,
    "fast_open": true, // 要使用 sysctl -w net.ipv4.tcp_fastopen=4
    "fast_open_qlen": 20
    },
    "mysql": {
    "enabled": false,
    "server_addr": "127.0.0.1",
    "server_port": 3306,
    "database": "trojan",
    "username": "trojan",
    "password": ""
    }
    }

配置systemd启动与运行权限

  • 使用一个非特权用户运行

    1
    2
    3
    ~# useradd -s /usr/sbin/nologin trojan
    ~# chown -R trojan:trojan /path/to/trojan
    ~# chmod u+x /path/to/trojan
  • 或者使用Capabilities来管理根限.如果不是特权用户是不绑定1024以下的端口的.

    1
    ~# setcap 'cap_net_bind_service=+eip' /path/to/trojan
  • 创建文件,/etc/systemd/system/trojan.service或者/lib/systemd/system/trojan.service

1
2
3
4
5
6
7
8
9
10
11
12
13
14
15
16
17
~$ cat /etc/systemd/system/trojan.service
[Unit]
Description=Trojan
After=network.target network-online.target nss-lookup.target

[Service]
User=trojan
Group=trojan
Restart=on-failure
Type=simple
ExecStart=/path/to/trojan -c /path/to/config.json

[Install]
WantedBy=multi-user.target

~$ sudo systemctl enable trojan
~$ sudo systemctl start trojan
  • 上面启动如果有错,使用systemctl status trojan再用journalctl -x | grep "trojan" -A +10查看具体错误原因.

##TLS1.3支持

  • 如果系统的openssl版本是在1.1.1以上的可以开启TLS1.3,加密可以改成如下:
    1
    TLS13-AES-256-GCM-SHA384:TLS13-CHACHA20-POLY1305-SHA256:TLS13-AES-128-GCM-SHA256:TLS13-AES-128-CCM-8-SHA256:TLS13-AES-128-CCM-SHA256:ECDHE-ECDSA-AES256-GCM-SHA384:ECDHE-RSA-AES256-GCM-SHA384:ECDHE-ECDSA-CHACHA20-POLY1305:ECDHE-RSA-CHACHA20-POLY1305:ECDHE-ECDSA-AES128-GCM-SHA256:ECDHE-RSA-AES128-GCM-SHA256:ECDHE-ECDSA-AES256-SHA384:ECDHE-RSA-AES256-SHA384:ECDHE-ECDSA-AES128-SHA256:ECDHE-RSA-AES128-SHA256

使用Docker安装

  • 主机上获取证书
    1
    2
    ~$ certbot certonly --nginx  --agree-tos --email yjdwbj@gmail.com  -d proxy.yjdwbj.cloudns.org --force-interactive
    ~$ chmod 644 /etc/letsencrypt/archive/proxy.yjdwbj.cloudns.org/privkey.pem

安装dnsmasq来加速解析(非必需)

1
2
3
4
5
6
7
8
9
10
11
12
13
14
15
16
17
18
19
20
~$ sudo apt-get install dnsmasq -y
~$ sudo cat > '/etc/dnsmasq.conf' << EOF
port=53
domain-needed
bogus-priv
enable-ra # 开启IPv6 delegation prefix
no-resolv
server=8.8.4.4#53
server=1.1.1.1#53
interface=lo
bind-interfaces
cache-size=10000
no-negcache
log-queries
log-facility=/var/log/dnsmasq.log
EOF

~$ sudo echo "nameserver 127.0.0.1" > /etc/resolv.conf || true
~$ sudo chattr +i /etc/resolv.conf || true
~$ sudo systemctl enable dnsmasq

使用Dokku安装

1
2
3
4
5
6
7
8
docker images
REPOSITORY TAG IMAGE ID CREATED SIZE
nextcloud latest 7aa569922593 14 hours ago 835MB
gliderlabs/herokuish latest 61872ca570ac 2 days ago 1.35GB
gliderlabs/herokuish v0.5.26 61872ca570ac 2 days ago 1.35GB
shadowsocks-libev latest cf7d25b78191 2 months ago 66.1MB
trojan latest 8fc0996f16f6 2 months ago 11.5MB
[....]
1
2
3
4
5
6
7
8
9
~$ dokku apps:create trojan
~$ dokku domains:add trojan proxy.llccyy.dynv6.net
~$ dokku config:set trojan --no-restart DOKKU_LETSENCRYPT_EMAIL=yjdwbj@gmail.com
~$ dokku letsencrypt trojan
~$ dokku storage:mount trojan /etc/trojan:/etc/trojan
#
~$ dokku storage:mount trojan /home/dokku/trojan/letsencrypt:/etc/letsencrypt
~$ docker tag trojan:latest dokku/trojan:latest
~$ dokku tags:deploy trojan latest

安装WireGuard

  • 现在WireGuard还没有进入Debian的稳定版本分支,需要使用下面命令安装.
1
2
3
4
5
6
~# echo "deb http://deb.debian.org/debian/ unstable main" > /etc/apt/sources.list.d/unstable-wireguard.list
~# printf 'Package: *\nPin: release a=unstable\nPin-Priority: 150\n' > /etc/apt/preferences.d/limit-unstable
~# uname -a
Linux localhost 4.19.0-6-amd64 #1 SMP Debian 4.19.67-2+deb10u2 (2019-11-11) x86_64 GNU/Linux
~# apt update
~# apt install linux-headers-4.19.0-6-amd64 wireguard-dkms wireguard-tools
  • 如果安装了WireGuard dkms模块了,但是又更新内核,这是是需要用重新编译并安装到新的内核里,如下:
1
2
3
4
5
6
7
8
9
10
11
12
13
14
15
16
~$ dkms status
[.....]
wireguard, 0.0.20200215, 5.5.5-20200223-lcy, x86_64: installed
sudo dkms build -m wireguard -v 0.0.20200215
Kernel preparation unnecessary for this kernel. Skipping...
Building module:
cleaning build area...
[.....]
cleaning build area...
DKMS: build completed.
~$ sudo dkms install -m wireguard -v 0.0.20200215
wireguard.ko:
[...]
depmod...
DKMS: install completed.

配置服务器

1
2
3
4
5
6
7
8
9
10
11
~$ cd /etc/wireguard/
~$ sudo wg genkey | tee privatekey | wg pubkey > publickey
~$ sudo cat > '/etc/wireguard/wg0.conf' << EOF
[Interface]
PrivateKey = <Private Key>
Address = 172.18.0.1/24, fd86:ea04:1115::1/64
ListenPort = 51820
PostUp = iptables -A FORWARD -i wg0 -j ACCEPT; iptables -t nat -A POSTROUTING -o eth0 -j MASQUERADE; ip6tables -A FORWARD -i wg0 -j ACCEPT; ip6tables -t nat -A POSTROUTING -o eth0 -j MASQUERADE
PostDown = iptables -D FORWARD -i wg0 -j ACCEPT; iptables -t nat -D POSTROUTING -o eth0 -j MASQUERADE; ip6tables -D FORWARD -i wg0 -j ACCEPT; ip6tables -t nat -D POSTROUTING -o eth0 -j MASQUERADE
SaveConfig = true
EOF

安装防火墙

1
2
3
4
5
~$ sudo apt-get install ufw
~$ sudo ufw allow 22/tcp
~$ sudo ufw allow 51820/udp
~$ sudo ufw enable
~$ sudo ufw status verbose

启动WireGuard

1
2
3
4
5
6
7
8
9
10
11
12
13
14
15
16
~$ sudo wg-quick up wg0
~$ sudo systemctl enable wg-quick@wg0
~$ sudo wg show
public key: DSdXQC01TD7Hk9sXXUKjevzJv6md+aK0x7/aKrmJMX8=
private key: (hidden)
listening port: 51820
~$ ifconfig wg0
ifconfig wg0
wg0: flags=209<UP,POINTOPOINT,RUNNING,NOARP> mtu 1420
inet 172.18.0.1 netmask 255.255.255.0 destination 172.18.0.1
inet6 fd86:ea04:1115::1 prefixlen 64 scopeid 0x0<global>
unspec 00-00-00-00-00-00-00-00-00-00-00-00-00-00-00-00 txqueuelen 1000 (UNSPEC)
RX packets 0 bytes 0 (0.0 B)
RX errors 0 dropped 0 overruns 0 frame 0
TX packets 0 bytes 0 (0.0 B)
TX errors 0 dropped 0 overruns 0 carrier 0 collisions 0

客户端

  • 客户端的安装方式如同服务端,VPN的配置都是对等配置,就是都要知道对方的公共密钥.
    1
    2
    3
    4
    5
    6
    7
    8
    9
    10
    11
    12
    13
    14
    15
    16
    ~$ cd /etc/wireguard/
    ~$ sudo wg genkey | tee privatekey | wg pubkey > publickey
    ~$ sudo cat > '/etc/wireguard/wg0.conf' << EOF
    [Interface]
    PrivateKey = <Private Key>
    Address = 172.18.0.2/24, fd86:ea04:1115::5/64
    [Peer]
    PublicKey= <Server Public Key>
    Endpoint = <Server IpAddress>:51820
    AllowedIPs = 172.18.0.2/24,fd86:ea04:1115::0/64
    EOF
    ~$ sudo wg-quick up wg0
    interface: wg0
    public key: <Public Key>
    private key: (hidden)
    listening port: 41743

服务端添加Peer

  • 上面就是配置好的客户端,但是还不能连接到上述的服务器去,现在还要在服务端里加上对等的Peer项,可以直接编辑服务端的/etc/wireguard/wg0.conf,也可以使用下面命令.
1
2
3
4
5
6
7
8
9
10
11
12
13
14
15
16
17
18
19
20
21
22
23
24
25
26
27
28
29
30
31
32
33
~$ sudo wg set wg0 peer <Client Public Key> allowed-ips 172.18.0.2/32
~$ sudo wg-quick save wg0 # 保存配置
~$ sudo wg
interface: wg0
public key: <Server Public Key>
private key: (hidden)
listening port: 51820

peer: <Client Public Key>
endpoint: <Client Public IpAddress>:<port>
allowed ips: 172.18.0.0/24, fd86:ea04:1115::/64
latest handshake: 2 hours, 44 minutes, 13 seconds ago
transfer: 3.16 MiB received, 13.16 MiB sent

~# cat /etc/wireguard/wg0.conf
Interface]
Address = 172.18.0.1/16
Address = fd86:ea04:1115::1/64
SaveConfig = true
PostUp = iptables -A FORWARD -i wg0 -j ACCEPT; iptables -t nat -A POSTROUTING -o eth0 -j MASQUERADE; ip6tables -A FORWARD -i wg0 -j ACCEPT; ip6tables -t nat -A POSTROUTING -o eth0 -j MASQUERADE
PostDown = iptables -D FORWARD -i wg0 -j ACCEPT; iptables -t nat -D POSTROUTING -o eth0 -j MASQUERADE; ip6tables -D FORWARD -i wg0 -j ACCEPT; ip6tables -t nat -D POSTROUTING -o eth0 -j MASQUERADE
ListenPort = 51820
PrivateKey = <public key of server>

[Peer]
PublicKey = <public key of client B>
AllowedIPs = 172.18.0.2/32
Endpoint = <public ip of Client B>:23637

[Peer]
PublicKey = <public key of client A>
AllowedIPs = 172.18.0.3/32
Endpoint = <public ip of Client A>:33506
  • 如果无错连接成功后,就可以从172.18.0.1ping 172.18.0.2.
  • 下面是一个服务器连接两个端点的配置:
    1
    2
    3
    4
    5
    6
    7
    8
    9
    10
    11
    12
    13
    14
    15
    16
    17
    18
    ~$ wg show
    interface: wg0
    public key: <server >
    private key: (hidden)
    listening port: 51820

    peer: <public key of Bob>
    endpoint: <Bob>:33506
    allowed ips: 172.18.0.3/32
    latest handshake: 50 seconds ago
    transfer: 35.55 KiB received, 36.31 KiB sent

    peer: <public key of Alice>
    endpoint: <Alice>:23637
    allowed ips: 172.18.0.2/32
    latest handshake: 2 minutes, 51 seconds ago
    transfer: 15.53 KiB received, 14.59 KiB sent

手机端通过QR加入服务器

  • Generating WireGuard QR codes for fast mobile deployments

  • 这里可以完全在服务端完成,现生成一组服务器的密钥对, 再建一个名为clients目录,在下面生成各个客户端的密钥与配置文件再把配置文件转成终端的QR图,供手机端扫码加入.

    1
    ~$ sudo mkdir -p /etc/wireguard/clients; wg genkey | sudo tee /etc/wireguard/clients/mobile.key | wg pubkey | sudo tee /etc/wireguard/clients/mobile.key.pub
  • 生成配置文件

    1
    2
    3
    4
    5
    6
    7
    8
    9
    10
    11
    12
    ~$ cat > /etc/wireguard/clients/mobile.conf <<EOF
    [Interface]
    PrivateKey = <mobile.key>
    Address = 10.0.0.10/24
    DNS = 1.1.1.1, 1.0.0.1

    [Peer]
    PublicKey = YOUR_SERVER_PUBLIC_KEY
    AllowedIPs = 0.0.0.0/0
    Endpoint = YOUR_SERVER_WAN_IP:51820
    EOF

  • 转换成QR图

1
~$ qrencode -t ansiutf8 < /etc/wireguard/clients/mobile.conf
  • 服务端加入该客户端并保存.
    1
    2
    ~$ sudo wg set wg0 peer <mobile.key.pub> allowed-ips 0.0.0.0/0
    ~$ sudo wg-quick save wg0

安装PolipoHTTP Proxy

  • Polipo
    1
    2
    3
    4
    5
    6
    7
    ~# cat > /etc/polipo/config <<EOF
    proxyAddress = "0.0.0.0"
    allowedClients=172.18.0.0/24,127.0.0.1,192.168.1.0/24
    socksParentProxy = "127.0.0.1:1080"
    EOF

    ~$ sudo systemctl restart polipo

安装V2Ray

简单脚本安装

  • 参照这里直接下载解压二进制的安装,不知会不会夹带私货.
    1
    2
    3
    4
    5
    6
    7
    8
    9
    10
    11
    12
    13
    14
    15
    16
    17
    18
    19
    ~$ bash <(curl -L -s https://install.direct/go.sh)
    Installing V2Ray v4.22.1 on x86_64
    Downloading V2Ray: https://github.com/v2ray/v2ray-core/releases/download/v4.22.1/v2ray-linux-64.zip
    % Total % Received % Xferd Average Speed Time Time Time Current
    Dload Upload Total Spent Left Speed
    100 608 100 608 0 0 9212 0 --:--:-- --:--:-- --:--:-- 9212
    100 11.6M 100 11.6M 0 0 24.3M 0 --:--:-- --:--:-- --:--:-- 24.3M
    awk: not an option: -e
    Archive: /tmp/v2ray/v2ray.zip
    inflating: /usr/bin/v2ray/geoip.dat
    inflating: /usr/bin/v2ray/geosite.dat
    inflating: /usr/bin/v2ray/v2ctl
    inflating: /usr/bin/v2ray/v2ray
    PORT:42747
    UUID:x009c053-xxxx-4420-xxxx-33b2fa35209x
    Archive: /tmp/v2ray/v2ray.zip
    inflating: /etc/systemd/system/v2ray.service
    Created symlink /etc/systemd/system/multi-user.target.wants/v2ray.service → /etc/systemd/system/v2ray.service.
    V2Ray v4.22.1 is installed.

源码编译安装

  • 安装合适的golang版本,具体可以查源码内的go.mod文件第一行。

    1
    2
    3
    4
    5
    ~$ sudo apt-get install golang-1.19 golang-1.19-go -y
    ~$ sudo update-alternatives --install /usr/lib/go/bin/go go /usr/lib/go-1.19/bin/go 80
    ~$ ln -svf /usr/lib/go/bin/go /usr/bin/go
    ~$ sudo update-alternatives --config go
    ~$ git clone https://github.com/v2fly/v2ray-core
  • v2ray-core编译安装方法可以使用它源码里的脚本v2ray-core/user-package.sh来运行即可,也可以直接运行v2ray-core/install-release.sh安装官方编译的版本。

  • 使用v2ray-core/user-package.sh编译的默认会生成一个如下的zip文件。

1
2
3
4
5
6
7
8
9
10
11
12
13
unzip ../v2ray-custom-amd64-linux-20220902-230653.zip
Archive: ../v2ray-custom-amd64-linux-20220902-230653.zip
inflating: vpoint_vmess_freedom.json
inflating: vpoint_socks_vmess.json
inflating: geoip.dat
inflating: geosite.dat
inflating: v2ray
inflating: config.json
inflating: geoip-only-cn-private.dat
creating: systemd/
creating: systemd/system/
inflating: systemd/system/v2ray.service
inflating: systemd/system/v2ray@.service
  • 需要系统控制服务,把v2ray.serveice复制到相应的系统目录下。

编译windows的客户端

1
2
3
4
5
6
7
8
9
10
11
12
13
14
15
16
17
18
19
20
21
22
23
24
25
26
27
28
~$ git clone https://github.com/v2fly/v2ray-core
~$ cd v2ray-core/release
~$ ln -svf ../../v2ray-core .
~$ cd ../
~$ sed -i 's/^nosource=0/nosource=1/g' release/user-package.sh
~$ sed -i 's/^GOARCH=arm/GOARCH=386/g' release/user-package.sh
~$ ./user-package.sh windows

Build ARGS: GOOS=windows GOARCH=386 CODENAME=user BUILDNAME=20230225-165708
PKG ARGS: pkg=zip
>>> Use current directory as WORKDIR
>>> Compile v2ray ...
>>> Compile v2ctl ...
>>> Download latest geoip...
>>> Download latest geosite...
>>> Copying config...
>>> Generating zip package
adding: vpoint_vmess_freedom.json (deflated 54%)
adding: vpoint_socks_vmess.json (deflated 50%)
adding: geoip.dat (deflated 77%)
adding: v2ray.exe (deflated 60%)
adding: geosite.dat (deflated 71%)
adding: wv2ray.exe (deflated 60%)
adding: config.json (deflated 60%)
adding: v2ctl.exe (deflated 60%)
adding: systemd/ (stored 0%)
>>> Generated: v2ray-custom-386-windows-20230225-165708.zip at /home/michael/3TB-DISK/github/v2ray/v2ray-core

Websockets+TLS+Nginx配置

v2ray-core服务端配置

1
2
3
4
5
6
7
8
9
10
11
12
13
14
15
16
17
18
19
20
21
22
23
24
25
26
27
28
29
30
31
32
33
34
35
36
37
38
39
40
41
42
43
44
45
46
47
48
49
50
51
52
53
54
{
"inbounds": [
{
"port": 10000,
"listen": "127.0.0.1",
"protocol": "vmess",
"settings": {
"clients": [
{
"id": "$your-uuid"
}
]
},
"streamSettings": {
"network": "ws",
"wsSettings": {
"path": "/vmess"
}
}
},
{
"port": 10001,
"listen": "127.0.0.1",
"protocol": "vless",
"settings": {
"decryption": "none",
"clients": [
{
"id": "$your-uuid",
"level": 0
}
]
},
"streamSettings": {
"network": "ws",
"wsSettings": {
"path": "/vless"
}
}
}
],
"outbounds": [
{
"protocol": "freedom",
"settings": {}
},
{
"protocol": "blackhole",
"settings": {},
"tag": "blocked"
}
]
}

v2ray-core客户端配置

1
2
3
4
5
6
7
8
9
10
11
12
13
14
15
16
17
18
19
20
21
22
23
24
25
26
27
28
29
30
31
32
33
34
35
36
37
38
39
40
41
42
43
44
45
46
47
48
49
50
51
52
53
54
55
56
57
58
59
60
61
62
63
64
65
66
67
68
69
70
71
72
73
74
75
76
77
78
79
80
81
82
83
84
85
86
87
88
89
90
91
92
93
94
95
96
97
98
99
100
101
102
103
104
105
106
107
108
109
110
111
112
113
114
115
116
117
118
119
120
121
122
123
{
"inbounds": [
{
"port": 1080,
"listen": "127.0.0.1",
"protocol": "socks",
"sniffing": {
"enabled": true,
"destOverride": [
"http",
"tls"
]
},
"settings": {
"udp": false
}
}
],
"outbounds": [
{
"protocol": "vmess",
"settings": {
"vnext": [
{
"address": "your-server-ip-or-domain",
"port": 443,
"users": [
{
"id": "your-uuid"
}
]
}
]
},
"mux": {
"enabled": true
},
"streamSettings": {
"network": "ws",
"security": "tls",
"wsSettings": {
"headers": {
"Host": "your-host"
},
"path": "/vmess"
},
"tlsSettings": {
"serverName": "your-server-name",
"allowInsecure": false
}
}
},
{
"protocol": "vless",
"settings": {
"vnext": [
{
"address": "your-server-ip-or-domain",
"port": 443,
"users": [
{
"id": "your-uuid",
"encryption": "none",
"level": 0
}
]
}
]
},
"mux": {
"enabled": true
},
"streamSettings": {
"network": "ws",
"security": "tls",
"wsSettings": {
"headers": {
"Host": "your-host"
},
"path": "/vless"
},
"tlsSettings": {
"serverName": "your-server-name",
"allowInsecure": false
}
}
},
{
"protocol": "dns",
"settings": {
"network": "tcp",
"address": "1.1.1.1",
"port": 53
}
},
{
"protocol": "blackhole",
"settings": {},
"tag": "adblock"
}
],
"routing": {
"domainStrategy": "IPOnDemand",
"rules": [
{
"type": "field",
"outboundTag": "direct",
"domain": [
"geosite:cn" // 国内的站点走直连,不转发到服务器
]
},
{
"type": "field",
"ip": [
"geoip:private", // 私有地址直连,不转发到服务器
"geoip:cn" // 国内的域名走直连,不转发到服务器
],
"outboundTag": "direct"
}
]
}
}

Nginx配置

  • Nginx主要是用于websockets的反向代理。
1
2
3
4
5
6
7
8
9
10
11
12
13
14
15
16
17
18
19
20
21
22
23
24
25
26
27
28
29
30
31
32
33
34
35
36
37
38
39
40
41
42
43
44
45
46
47
48
root@localhost:~# cat /etc/nginx/sites-available/ssl
server {
listen 443 ssl;
listen [::]:443 ssl;

ssl_certificate /etc/letsencrypt/$your-server-domain/fullchain.pem;
ssl_certificate_key /etc/letsencrypt/live/$your-server-domain/privkey.pem;
ssl_session_timeout 1d;
ssl_session_cache shared:MozSSL:10m;
ssl_session_tickets off;

ssl_protocols TLSv1.2 TLSv1.3;
ssl_ciphers ECDHE-ECDSA-AES128-GCM-SHA256:ECDHE-RSA-AES128-GCM-SHA256:ECDHE-ECDSA-AES256-GCM-SHA384:ECDHE-RSA-AES256-GCM-SHA384:ECDHE-ECDSA-CHACHA20-POLY1305:ECDHE-RSA-CHACHA20-POLY1305:DHE-RSA-AES128-GCM-SHA256:DHE-RSA-AES256-GCM-SHA384;
ssl_prefer_server_ciphers off;

server_name $your-server-domain;
location / {
return 204;
}

location /vmess {
proxy_redirect off;
proxy_pass http://127.0.0.1:10000;
proxy_http_version 1.1;
proxy_set_header Upgrade $http_upgrade;
proxy_set_header Connection "Upgrade";
proxy_set_header Host $http_host;
# Show real IP in v2ray access.log
# proxy_set_header X-Real-IP $remote_addr;
proxy_intercept_errors on;
proxy_set_header X-Forwarded-For $proxy_add_x_forwarded_for;
}

location /vless {
proxy_redirect off;
proxy_pass http://127.0.0.1:10001;
proxy_http_version 1.1;
proxy_set_header Upgrade $http_upgrade;
proxy_set_header Connection "Upgrade";
proxy_set_header Host $http_host;
# Show real IP in v2ray access.log
# proxy_set_header X-Real-IP $remote_addr;
proxy_intercept_errors on;
proxy_set_header X-Forwarded-For $proxy_add_x_forwarded_for;
}
add_header Strict-Transport-Security "max-age=31536000; includeSubDomains" always;
}

Http2+TLS配置

  • 注意,这里并没有使用nginx来做前置代理,因为nginx现在还不能代理http2的请求,网上有所以这里是直接把v2ray-core的服务暴露出来。这里涉及到一些内外网分流,要用到geoip的数据做为判断,这里主要是使用geoip.datgeosite.dat,如果要更极致一点, 可以参考使用V2Ray 路由规则文件加强版

服务端

1
2
3
4
5
6
7
8
9
10
11
12
13
14
15
16
17
18
19
20
21
22
23
24
25
26
27
28
29
30
31
32
33
34
35
36
37
38
39
40
41
42
43
44
45
46
47
48
49
50
51
52
53
54
55
56
57
58
59
60
61
62
63
64
65
66
67
68
69
70
71
72
73
74
75
76
77
78
79
80
81
82
83
84
85
86
87
88
89
90
91
92
93
94
95
96
97
98
99
{
"log": {
"loglevel": "warning"
},
"inbounds": [
{
"port": 10000,
"listen": "127.0.0.1",
"protocol": "vmess",
"settings": {
"clients": [
{
"id": "your-uuid" // 与客户端一定要匹配
}
]
},
"streamSettings": {
"network": "ws",
"wsSettings": {
"path": "/vmess"
}
},
"sniffing": {
"enabled": true,
"destOverride": [
"http",
"tls"
]
}
},
{
"port": 10001,
"listen": "127.0.0.1",
"protocol": "vless",
"settings": {
"decryption": "none",
"clients": [
{
"id": "your-uuid",
"level": 0
}
]
},
"streamSettings": {
"network": "ws",
"wsSettings": {
"path": "/vless"
}
}
},
{
"port": 1443,
"listen": "<local ip4>",
"protocol": "vmess",
"settings": {
"clients": [
{
"id": "your-uuid"
}
]
},
"sniffing": {
"enabled": true,
"destOverride": [
"http",
"tls"
]
},
"streamSettings": {
"network": "http",
"security": "tls",
"httpSettings": {
"path": "/ray"
},
"tlsSettings": {
"certificates": [
{
"certificateFile": "/etc/letsencrypt/live/<your-server-domain>/fullchain.pem",
"keyFile": "/etc/letsencrypt/live/<your-server-domain>/privkey.pem"
}
]
}
}
}
],
"outbounds": [
{
"protocol": "freedom",
"tag": "direct",
"settings": {}
},
{
"protocol": "blackhole",
"settings": {},
"tag": "blocked"
}
]
}

客户端

1
2
3
4
5
6
7
8
9
10
11
12
13
14
15
16
17
18
19
20
21
22
23
24
25
26
27
28
29
30
31
32
33
34
35
36
37
38
39
40
41
42
43
44
45
46
47
48
49
50
51
52
53
54
55
56
57
58
59
60
61
62
63
64
65
66
67
68
69
70
71
72
73
74
75
76
77
78
79
80
81
82
83
84
85
86
87
88
89
90
91
92
93
94
95
96
97
98
99
100
101
102
103
104
105
106
107
108
109
110
111
112
113
114
115
116
117
118
119
120
121
122
123
124
125
126
127
128
129
130
131
132
133
134
135
136
137
138
139
140
141
142
143
144
145
146
147
148
149
{
"log": {
"loglevel": "warning"
},
"inbounds": [
{
"port": 3080,
"listen": "127.0.0.1",
"protocol": "socks",
"settings": {
"udp": false
},
"sniffing": {
"enabled": true,
"destOverride": [
"http",
"tls"
]
}
}
],
"outbounds": [
{
"protocol": "vmess",
"settings": {
"vnext": [
{
"port": 1443,
"address": "your-server-address",
"users": [
{
"id": "your-uuid" // 与服务端的对应的inbounds定义块是一致的。
}
]
}
]
},
"streamSettings": {
"network": "http",
"security": "tls",
"tag": "proxy",
"httpSettings": {
"path": "/ray"
},
"tlsSettings": {
"allowInsecure": false
}
}
},
{
"protocol": "freedom",
"tag": "direct"
},
{
"protocol": "blackhole",
"settings": {},
"tag": "adblock"
}
],
"dns": {
"servers": [
{
"address": "223.5.5.5",
"port": 53,
"domains": [
"geosite:cn",
"ntp.org",
"your-server-address"
]
},
{
"address": "114.114.114.114",
"port": 53,
"domains": [
"geosite:cn",
"ntp.org"
]
},
{
"address": "8.8.8.8",
"port": 53,
"domains": [
"geosite:geolocation-!cn"
]
},
{
"address": "1.1.1.1",
"port": 53,
"domains": [
"geosite:geolocation-!cn"
]
}
]
},
"routing": {
"strategy": "rules",
"settings": {
"domainStrategy": "IPOnDemand",
"rules": [
{
"domain": [
"goproxy.io",
"amazon.com",
"microsoft.com",
"jd.com",
"youku.com",
"baidu.com"
],
"type": "field",
"outboundTag": "direct"
},
{
"type": "field",
"domain": [
"barkinwee.live", // 自己收集定义的一些广告网站,加入到这里来进行阻止访问。
"bestrealprizes.life",
"snapcheat16s.com",
"cloudnetstorage.com",
"hot-dating-here.life",
"glg.spign.nl",
"www.needevery.in",
"next-pops.top",
"1423.barkinwee.live",
"get-my-prize.in",
"achieve-superprizes.life",
"geosite:category-ads-all"
],
"outboundTag": "adblock"
},
{
"type": "field",
"ip": [
"geoip:private",
"geoip:cn"
],
"outboundTag": "direct"
},
{
"type": "field",
"domain": [
"geosite:cn"
],
"outboundTag": "direct"
}
]
}
}
}

搭建一个中继

  • 这里中继是解决我一个手机使用的场景,手机的移动网络无法直连VPS的服务,地址的都ping不通,但是家里的宽带网络可以正常访问。所以在家里搭一个中继,使用IPv6+DDNS直接访问, 它是一个服务端又是一个客户端。可以使用一个如树莓派的单板机来足够担挡。

  • server.bridge.json

    1
    2
    3
    4
    5
    6
    7
    8
    9
    10
    11
    12
    13
    14
    15
    16
    17
    18
    19
    20
    21
    22
    23
    24
    25
    26
    27
    28
    29
    30
    31
    32
    33
    34
    35
    36
    37
    38
    39
    40
    41
    42
    43
    44
    45
    46
    47
    48
    49
    50
    51
    52
    53
    54
    55
    56
    57
    58
    59
    60
    61
    {
    "log": {
    "loglevel": "none"
    },
    "inbounds": [
    {
    "tag": "rpi",
    "port": 1443,
    "protocol": "vmess",
    "settings": {
    "clients": [
    {
    "id": "your-bridge-uuid" // 连接本机的客户端的uuid要与这里是一致的。
    }
    ]
    }
    }
    ],
    "outbounds": [
    {
    "tag": "vps",
    "protocol": "vmess",
    "settings": {
    "vnext": [
    {
    "port": 1443,
    "address": "your-server-address", // linode上VPS的uuid,它才是正真提供上网出口的服务
    "users": [
    {
    "id": "your-uuid"
    }
    ]
    }
    ]
    },
    "streamSettings": {
    "network": "http",
    "security": "tls",
    "tag": "proxy",
    "httpSettings": {
    "path": "/ray"
    },
    "tlsSettings": {
    "allowInsecure": false
    }
    }
    }
    ],
    "routing":{
    "rules":[
    {
    "type":"field",
    "inboundTag":[
    "rpi"
    ],
    "outboundTag":"vps" // 路由很重要,把rpi入站的全部转到vps出站
    }
    ]
    }
    }

  • 客户端的配置与上面其它方案类似

1
2
3
4
5
6
7
8
9
10
11
12
13
14
15
16
17
18
19
20
21
22
23
24
25
26
27
28
29
30
31
32
33
34
35
36
37
38
39
40
41
42
43
44
45
46
47
48
49
50
51
52
53
54
55
56
57
58
59
60
61
62
63
64
65
66
67
68
69
70
71
72
73
74
75
76
77
78
79
80
81
82
83
84
85
86
87
88
89
90
91
92
93
94
95
96
97
98
99
100
101
102
103
104
105
106
107
108
109
110
111
112
113
114
115
116
117
118
119
120
121
122
123
124
125
126
{
"inbounds": [
{
"port": 1080,
"listen": "127.0.0.1",
"protocol": "socks",
"settings": {
"udp": false
}
}
],
"outbounds": [
{
"protocol": "vmess",
"settings": {
"vnext": [
{
"port": 1443,
"address": "yourdns.dynv6.net",
"users": [
{
"id": "your-bridge-uuid"
}
]
}
]
}
},
{
"protocol": "freedom",
"tag": "direct"
},
{
"protocol": "blackhole",
"settings": {},
"tag": "adblock"
}
],
"dns": {
"servers": [
{
"address": "223.5.5.5",
"port": 53,
"domains": [
"geosite:cn",
"ntp.org"
]
},
{
"address": "114.114.114.114",
"port": 53,
"domains": [
"geosite:cn",
"ntp.org"
]
},
{
"address": "8.8.8.8",
"port": 53,
"domains": [
"geosite:geolocation-!cn"
]
},
{
"address": "1.1.1.1",
"port": 53,
"domains": [
"geosite:geolocation-!cn"
]
}
]
},
"routing": {
"strategy": "rules",
"settings": {
"domainStrategy": "IPOnDemand",
"rules": [
{
"domain": [
"goproxy.io",
"amazon.com",
"microsoft.com",
"jd.com",
"youku.com",
"baidu.com"
],
"type": "field",
"outboundTag": "direct"
},
{
"type": "field",
"domain": [
"barkinwee.live",
"bestrealprizes.life",
"snapcheat16s.com",
"cloudnetstorage.com",
"hot-dating-here.life",
"glg.spign.nl",
"www.needevery.in",
"next-pops.top",
"1423.barkinwee.live",
"get-my-prize.in",
"achieve-superprizes.life",
"geosite:category-ads-all"
],
"outboundTag": "adblock"
},
{
"type": "field",
"ip": [
"geoip:private",
"geoip:cn"
],
"outboundTag": "direct"
},
{
"type": "field",
"domain": [
"geosite:cn"
],
"outboundTag": "direct"
}
]
}
}
}

v2ray搭配shadowsocks

  • 服务端
1
2
3
4
5
6
7
8
9
10
11
12
13
14
15
16
17
18
19
20
21
22
23
24
{
"inbounds": [
{
"port": 2443,
"protocol": "shadowsocks",
"settings": {
"password": "<your-password>",
"method": "chacha20-ietf-poly1305"
}
}
],
"outbounds": [
{
"protocol": "freedom",
"tag": "direct",
"settings": {}
},
{
"protocol": "blackhole",
"settings": {},
"tag": "blocked"
}
]
}
  • 客户端
1
2
3
4
5
6
7
8
9
10
11
12
13
14
15
16
17
18
19
20
21
22
23
24
25
26
27
28
29
30
31
32
33
34
35
36
37
38
39
40
41
42
43
44
45
46
47
48
49
50
51
52
53
54
55
56
57
58
59
60
61
62
63
64
65
66
67
68
69
70
71
72
73
74
75
76
77
78
79
80
81
82
83
84
85
86
87
88
89
90
91
92
93
94
95
96
97
98
99
100
101
102
103
104
105
106
107
108
109
110
111
112
113
114
115
116
117
118
119
120
121
122
123
124
125
126
127
128
129
130
131
132
133
{
"inbounds": [
{
"port": 3080,
"protocol": "socks",
"settings": {
"udp": false
}
}
],
"outbounds": [
{
"protocol": "shadowsocks",
"settings": {
"servers": [
{
"address": "vps6", // 走IPv6
"port": 2443,
"password": "<your-password>",
"method": "chacha20-ietf-poly1305"
},
{
"address": "vps", // 走IPv4
"port": 2443,
"password": "<your-password>",
"method": "chacha20-ietf-poly1305"
}
]
}
},
{
"protocol": "freedom",
"tag": "direct"
},
{
"protocol": "blackhole",
"settings": {},
"tag": "adblock"
}
],
"dns": {
"servers": [
{
"address": "223.5.5.5",
"port": 53,
"domains": [
"geosite:cn",
"ntp.org"
]
},
{
"address": "114.114.114.114",
"port": 53,
"domains": [
"geosite:cn",
"ntp.org"
]
},
{
"address": "8.8.8.8",
"port": 53,
"domains": [
"geosite:geolocation-!cn"
]
},
{
"address": "1.1.1.1",
"port": 53,
"domains": [
"geosite:geolocation-!cn"
]
}
]
},
"routing": {
"strategy": "rules",
"settings": {
"domainStrategy": "IPOnDemand",
"rules": [
{
"domain": [
"goproxy.io",
"amazon.com",
"microsoft.com",
"jd.com",
"youku.com",
"baidu.com",
"cn.element14.com",
"taobao.com",
"proxy.golang.com.cn"
],
"type": "field",
"outboundTag": "direct"
},
{
"type": "field",
"domain": [
"barkinwee.live",
"bestrealprizes.life",
"snapcheat16s.com",
"cloudnetstorage.com",
"hot-dating-here.life",
"glg.spign.nl",
"www.needevery.in",
"next-pops.top",
"1423.barkinwee.live",
"get-my-prize.in",
"achieve-superprizes.life",
"geosite:category-ads-all"
],
"outboundTag": "adblock"
},
{
"type": "field",
"ip": [
"geoip:private",
"geoip:cn"
],
"outboundTag": "direct"
},
{
"type": "field",
"domain": [
"geosite:cn",
"iqiy.com"
],
"outboundTag": "direct"
}
]
}
}
}

  • 使用systemd管理v2ray服务
1
2
3
4
5
6
7
8
9
10
11
12
13
14
15
16
17
18
~$ cat /etc/systemd/system/v2ray.service
[Unit]
Description=V2Ray Service
Documentation=https://www.v2fly.org/
After=network.target nss-lookup.target

[Service]
DynamicUser=yes
CapabilityBoundingSet=CAP_NET_ADMIN CAP_NET_BIND_SERVICE
AmbientCapabilities=CAP_NET_ADMIN CAP_NET_BIND_SERVICE
NoNewPrivileges=true
ExecStart=/usr/local/bin/v2ray run -config /etc/v2ray/config.json
Restart=on-failure
RestartPreventExitStatus=23

[Install]
WantedBy=multi-user.target

  • 最终可以把两个配置合并成一个配置文件如下:
1
2
3
4
5
6
7
8
9
10
11
12
13
14
15
16
17
18
19
20
21
22
23
24
25
26
27
28
29
30
31
32
33
34
35
36
37
38
39
40
41
42
43
44
45
46
47
48
49
50
51
52
53
54
55
56
57
58
59
60
61
62
63
64
65
66
67
68
69
70
71
72
73
74
75
76
77
78
79
80
81
82
83
84
85
86
87
88
89
90
91
~$ cat /etc/v2ray/config.json
{
"inbounds": [
{
"port": 3080,
"protocol": "socks",
"settings": {
"udp": false
},
"sniffing": {
"enabled": true,
"destOverride": [
"http",
"tls"
]
}
},
{
"tag": "rpi",
"port": 1443,
"protocol": "vmess",
"settings": {
"clients": [
{
"id": "you-as-server-uuid"
}
]
}
}
],
"outbounds": [
{
"protocol": "vmess",
"settings": {
"vnext": [
{
"port": 1443,
"address": "your-server-domain-or-address",
"users": [
{
"id": "your-remote-server-uuid"
}
]
}
]
},
"streamSettings": {
"network": "http",
"security": "tls",
"tag": "proxy",
"httpSettings": {
"path": "/ray"
},
"tlsSettings": {
"allowInsecure": false
}
}
},
{
"protocol": "freedom",
"tag": "direct"
},
{
"protocol": "blackhole",
"settings": {},
"tag": "adblock"
}
],
"dns": {
"servers": [
[...]
]
},
"routing": {
"strategy": "rules",
"settings": {
"domainStrategy": "IPOnDemand",
"rules": [
{
"type": "field",
"inboundTag": [
"rpi"
],
"outboundTag": "vps"
},
[....]
]
}
}
}

  • 使用geoip文件的需要复制到/usr/share/v2ray目录下
1
2
3
~$ ls /usr/share/v2ray/geo*
/usr/share/v2ray/geoip.dat /usr/share/v2ray/geosite.dat

Android手机客户端

  • SagerNet/SagerNet,可以从源码编译,也可以从F-Droid下载。另一个同类型的客户端2dust/v2rayNG,安装后,无法边接到服务器,但是SagerNet是可以的。具体编译安装参照本文的shadowsocks-android.

shadowsocks-libev

  • 编译安装
    1
    2
    3
    4
    5
    6
    7
    8
    ~$ apt-get install  libsodium-dev libmbedtls-dev libev-dev libpcre3-dev libc-ares-dev cmake \
    libbloom-dev libcork-dev libc-ares2 libipset-dev -y
    ~$ git clone https://github.com/shadowsocks/shadowsocks-libev
    ~$ cd shadowsocks-libev/
    ~$ git submodule update --init --recursive
    ~$ cd build/
    ~$ cmake ../
    ~$ make && make install

配置ss-server

1
2
3
4
5
6
7
8
9
10
11
12
13
14
15
~$ sudo mkdir /etc/shadowsocks-libev/
~$ cd /etc/shadowsocks-libev/
~$ sudo cat > config.json < EOF
{
"server": ["::","0.0.0.0"],
"server_port": 8443,
"password": "<password>",
"method": "chacha20-ietf-poly1305",
"timeout":300,
"mode": "tcp_and_udp",
"fast_open": true
}
EOF

~$ ss-server -c /etc/shadowsocks-libev/config.json

配置ss-local

1
2
3
4
5
6
7
8
9
10
{
"server": "<server ip>",
"server_port": 8443,
"local_port": 1088,
"password": "<passwd>",
"method": "chacha20-ietf-poly1305",
"timeout":60,
"fast_open": false,
"mode": "tcp_and_udp"
}
  • 在本地运行一个ss-local -c ./config.json实例,成功连接后,可以使用127.0.0.1:1088的去做Socks5代理了.

SargerNet客户端

1
2
3
4
~$ git clone https://github.com/SagerNet/SagerNet
~$ cd SagerNet
~$ git submodule update --init --recursive
~$ export _JAVA_OPTIONS="-Djava.net.preferIPv6Addresses=true"
  • maybe should set proxy
1
2
3
4
5
6
~$ cat ~/.gradle/gradle.properties
systemProp.http.proxyHost=127.0.0.1
systemProp.http.proxyPort=2080
systemProp.https.proxyHost=127.0.0.1
systemProp.https.proxyPort=2080

shadsowsocks-android客户端

  • 下载源码并设置编译环境

    1
    2
    3
    4
    5

    ~$ git clone --recurse-submodules https://github.com/shadowsocks/shadowsocks-android
    ~$ cd shadowsocks-android && git submodule update --init --recursive
    ~$ cd core/src/main/rust/shadowsocks-rust
    ~$ rustup target add armv7-linux-androideabi aarch64-linux-android i686-linux-android x86_64-linux-android
  • 这里可以用使用sdkman安装java的开发环境:jdk,gradle. 如果本机支持IPv6连接,可能需要设如下变量:

1
~$ export _JAVA_OPTIONS="-Djava.net.preferIPv6Addresses=true"
  • 还需要安装rust的开发环境。
1
2
3
~$ rustup target add aarch64-linux-android
~$ rustup target add armv7-linux-androideabi
~$ rustup target add x86_64-linux-android
  • 编译错误,如下所示,需要设置:export _JAVA_OPTIONS="-Djava.net.preferIPv6Addresses=true -Dhttps.protocols=TLSv1.2".
1
2
3
4
5
6
7
8
9
10
11
FAILURE: Build failed with an exception.

* What went wrong:
Execution failed for task ':buildSrc:compileKotlin'.
> Error while evaluating property 'filteredArgumentsMap' of task ':buildSrc:compileKotlin'
> Could not resolve all files for configuration ':buildSrc:compileClasspath'.
> Could not download kotlin-stdlib-jdk8-1.5.21.jar (org.jetbrains.kotlin:kotlin-stdlib-jdk8:1.5.21)
> Could not get resource 'https://jcenter.bintray.com/org/jetbrains/kotlin/kotlin-stdlib-jdk8/1.5.21/kotlin-stdlib-jdk8-1.5.21.jar'.
> Could not HEAD 'https://jcenter.bintray.com/org/jetbrains/kotlin/kotlin-stdlib-jdk8/1.5.21/kotlin-stdlib-jdk8-1.5.21.jar'.
> The server may not support the client's requested TLS protocol versions: (TLSv1.2, TLSv1.3). You may need to configure the client to allow other protocols to be used. See: https://docs.gradle.org/7.2/userguide/build_environment.html#gradle_system_properties

  • rust编译错误,这里只需按提示处理就可以了.运行rustup target add armv7-linux-androideabi后再重新运行编译。
1
2
3
4
5
6
7
8
9
10
   Compiling parking_lot_core v0.9.3
error[E0463]: can't find crate for `core`
|
= note: the `armv7-linux-androideabi` target may not be installed
= help: consider downloading the target with `rustup target add armv7-linux-androideabi`

error[E0463]: can't find crate for `compiler_builtins`

error[E0463]: can't find crate for `core`

  • 编译错误
1
2
3
4
5
6
7
8
9
10
11
12
13
14
error[E0554]: `#![feature]` may not be used on the stable release channel
--> /home/michael/.cargo/registry/src/github.com-1ecc6299db9ec823/chacha20-0.8.2/src/lib.rs:82:5
|
82 | feature(stdsimd, aarch64_target_feature)
| ^^^^^^^^^^^^^^^^^^^^^^^^^^^^^^^^^^^^^^^^
|
= help: the feature `aarch64_target_feature` has been stable since 1.61.0 and no longer requires an attribute to enable

error[E0554]: `#![feature]` may not be used on the stable release channel
--> /home/michael/.cargo/registry/src/github.com-1ecc6299db9ec823/chacha20-0.8.2/src/lib.rs:82:13
|
82 | feature(stdsimd, aarch64_target_feature)
| ^^^^^^^

  • 上面的错误,是因为rust的工具链不匹配造成的。按如下操作使用nightly版本的工具链。
1
2
3
4
5
6
~$ rustup toolchain list
~$ rustup default nightly
~$ rustup update
~$ rustup target add aarch64-linux-android
~$ rustup target add armv7-linux-androideabi
~$ rustup target add x86_64-linux-android
  • 再继续编译工程
1
2
~$ ./gradlew build
~$ ./gradlew assembleRelease

安装apk

  • 生成apk自签名用的key
1
2
3
4
5
6
7
8
9
10
11
12
13
14
15
16
17
18
19
20
21
~$ keytool -genkey -v -keystore ~/.android/lcy-release.keystore -alias self-build-signed -keyalg RSA -keysize 2048 -validity 10000
Enter keystore password:
Re-enter new password:
What is your first and last name?
[Unknown]:
What is the name of your organizational unit?
[Unknown]:
What is the name of your organization?
[Unknown]:
What is the name of your City or Locality?
[Unknown]:
What is the name of your State or Province?
[Unknown]:
What is the two-letter country code for this unit?
[Unknown]:
Is CN=Unknown, OU=Unknown, O=Unknown, L=Unknown, ST=Unknown, C=Unknown correct?
[no]: yes
Generating 2,048 bit RSA key pair and self-signed certificate (SHA256withRSA) with a validity of 10,000 days
for: CN=Unknown, OU=Unknown, O=Unknown, L=Unknown, ST=Unknown, C=Unknown
[Storing /home/michael/.android/lcy-release.keystore]

  • 查看目标手机的CPU架构。
1
2
$ adb shell getprop ro.product.cpu.abi
arm64-v8a
  • 对目标安装文件进行zip压缩对齐
1
2
3
shadowsocks-android$ export PATH=~/Android/Sdk/build-tools/33.0.0:$PATH
shadowsocks-android$ cd mobile/build/outputs/apk/release/
shadowsocks-android$ zipalign -v -p 4 mobile-arm64-v8a-release-unsigned.apk mobile-arm64-v8a-release-unsigned-aligned.apk
  • apk签名
1
shadowsocks-android$ apksigner sign --ks ~/.android/lcy-release.keystore --out shadowsocks-android-master-$(date +%Y-%m-%d)-signed.apk mobile-arm64-v8a-release-unsigned-aligned.apk
  • 安装apk
1
shadowsocks-android/mobile/build/outputs/apk/release$ adb install shadowsocks-android-master-2022-08-28-signed.apk

使用Cloudflare

  • 发现在使用cloudflare有几个前提,1.需要有一个域名,2.网站访问必须支持TLS/HTTPS,而且我这里使用的是Full(strict)模式:Encrypts end-to-end, but requires a trusted CA or Cloudflare Origin CA certificate on the server.域名我是在dynadot上注册的,选了一个15元一年的域名。

  • 先在https://www.cloudflare.com注册一个帐号,在dash -> Websites -> Add a Site,添加刚才注册的域名,如:example.com。进入example.com站点内,查看DNS -> Records -> Cloudflare Nameservers,会为这个example.com域名分配两个域名服务器NS. 再进入到dynadot -> My Domains -> Name Servers删除默认的dynadot提供的NS,添加cloudflare分配的这两个NS链接。

使用Nginx代理v2ray+headscale

  • 先在DNS -> Records -> Cloudflare Nameservers添加两个A 记录, 如:vmss.example.com,headscale.example.com,这里必须这两个主机名申请到证书,如上面用acme.sh去申请。这里原来走了一些弯路使用了cloudflare -> SSL/TLS -> Edge Certificates,导致下面的验证无法成功。
1
2
3
4
5
6
7
8
9
10
11
12
13
14
15
16
17
18
19
20
21
22
23
24
25
26
27
28
29
30
31
32
33
34
35
36
37
38
39
40
41
42
43
44
45
46
47
48
49
50
51
52
53
54
55
56
57
58
59
60
61
62
63
64
65
66
67
68
69
70
71
72
73
74
75
76
77
78
79
80
~$ cat /etc/nginx/sites-enabled/ssl
map $http_upgrade $connection_upgrade {
default keep-alive;
'websocket' upgrade;
'' close;
}

server {
listen 443 ssl http2;
listen [::]:443 ssl http2 ;

ssl_certificate /etc/v2ray/ssl/fullchain.cer;
ssl_certificate_key /etc/v2ray/ssl/vmss.example.com;
ssl_session_timeout 1d;
ssl_session_cache shared:MozSSL:10m;
ssl_session_tickets off;

ssl_protocols TLSv1.1 TLSv1.2 TLSv1.3;
#ssl_ciphers ECDHE-ECDSA-AES128-GCM-SHA256:ECDHE-RSA-AES128-GCM-SHA256:ECDHE-ECDSA-AES256-GCM-SHA384:ECDHE-RSA-AES256-GCM-SHA384:ECDHE-ECDSA-CHACHA20-POLY1305:ECDHE-RSA-CHACHA20-POLY1305:DHE-RSA-AES128-GCM-SHA256:DHE-RSA-AES256-GCM-SHA384;
ssl_ciphers HIGH:!aNULL:!MD5;
ssl_prefer_server_ciphers off;

server_name vmss.example.com;
location / {
proxy_redirect off;
proxy_pass http://127.0.0.1:10000;
proxy_http_version 1.1;
proxy_set_header Upgrade $http_upgrade;
proxy_set_header Connection $connection_upgrade;
proxy_set_header Host $server_name;
proxy_redirect http:// https://;
# Show real IP in v2ray access.log
# proxy_set_header X-Real-IP $remote_addr;
proxy_intercept_errors on;
proxy_set_header X-Forwarded-For $proxy_add_x_forwarded_for;
proxy_set_header X-Forwarded-Proto $http_x_forwarded_proto;
add_header Strict-Transport-Security "max-age=31536000; includeSubDomains" always;
}

}

server {
listen 443 ssl http2 ;
listen [::]:443 ssl http2 ;

ssl_certificate /etc/nginx/ssl/fullchain.cer;
ssl_certificate_key /etc/nginx/ssl/headscale.example.com;
ssl_session_timeout 1d;
ssl_session_cache shared:MozSSL:10m;
ssl_session_tickets off;

ssl_protocols TLSv1.1 TLSv1.2 TLSv1.3;
#ssl_ciphers ECDHE-ECDSA-AES128-GCM-SHA256:ECDHE-RSA-AES128-GCM-SHA256:ECDHE-ECDSA-AES256-GCM-SHA384:ECDHE-RSA-AES256-GCM-SHA384:ECDHE-ECDSA-CHACHA20-POLY1305:ECDHE-RSA-CHACHA20-POLY1305:DHE-RSA-AES128-GCM-SHA256:DHE-RSA-AES256-GCM-SHA384;
ssl_ciphers HIGH:!aNULL:!MD5;
ssl_prefer_server_ciphers off;

server_name headscale.example.com;
location / {
proxy_redirect off;
proxy_pass http://127.0.0.1:8080;
proxy_http_version 1.1;
proxy_set_header Upgrade $http_upgrade;
proxy_set_header Connection $connection_upgrade;
proxy_set_header Host $server_name;
proxy_redirect http:// https://;
# Show real IP in v2ray access.log
# proxy_set_header X-Real-IP $remote_addr;
proxy_intercept_errors on;
proxy_set_header X-Forwarded-For $proxy_add_x_forwarded_for;
proxy_set_header X-Forwarded-Proto $http_x_forwarded_proto;
add_header Strict-Transport-Security "max-age=31536000; includeSubDomains" always;
}

# 这里的headscale-ui就是上面docker-compose.yml的设置。
location /web/ {
proxy_pass https://127.0.0.1:9443/web/;
}

}

  • headscale的配置部署就如上面所述,v2ray的配置是基于ws,没有设置TLS加密,TLS交给Nginx反向代理去处理。
1
2
3
4
5
6
7
8
9
10
11
12
13
14
15
16
17
18
19
20
21
22
23
24
25
26
27
28
29
30
31
32
33
34
35
36
37
38
39
40
41
42
43
44
45
46
47
48
49
50
51
52
53
~$ cat /etc/v2ray/config.json
{
"log": {
"loglevel": "none"
},
"inbounds": [
{
"port": 10000,
"protocol": "vmess",
"settings": {
"clients": [
{
"id": "<your uuid>",
"alterId": 0
}
]
},
"streamSettings": {
"network": "ws",
"wsSettings": {
"path": "/wss",
"headers": {
"Host": "vmess.exmaple.com"
}
}
}
}
],
"outbounds": [
{
"protocol": "freedom",
"tag": "direct",
"settings": {}
},
{
"protocol": "blackhole",
"settings": {},
"tag": "blocked"
}
],
"routing": {
"rules": [
{
"type": "field",
"ip": [
"geoip:private"
],
"outboundTag": "blocked"
}
]
}
}

错误

1
rejected  proxy/vmess/encoding: invalid user > proxy/vmess: Not Found
  • 上面错误,很有可能是有客户端与服务器的时间不对,需要与世界时钟服务器去同步。

URI与二维码

  • quick-guide

  • 在一些移动APP中,为了安全或是方便分享,可以使用二维码来添加服务器.它的最终格式如下:

    1
    ss://YmYtY2ZiOnRlc3QvIUAjOkAxOTIuMTY4LjEwMC4xOjg4ODg#example-server
  • 示例,如有一个服务器是192.168.100.1:8888,使用bf-cfb的加密算法,密码是test/!@#:,它的明文URI是:
    ss://bf-cfb:test/!@#:@192.168.100.1:8888,需要把它编码BASE64格式的URI,下面通过浏览器的Web Console运行:

    1
    2
    > console.log( "ss://" + btoa("bf-cfb:test/!@#:@192.168.100.1:8888") )
    ss://YmYtY2ZiOnRlc3QvIUAjOkAxOTIuMTY4LjEwMC4xOjg4ODg=
  • 现在可以把BASE64URI再编码成二维码,还可以加名字标记如:ss:<BASE64>#<server-name>,quick-guide的后面生成二维的工具,IOS系统中的客户端名字是Outline App,它就是只能通过URI来添加服务器.

配置Systemd服务

  • 这里可以参照上面trojan的系统服务,也可以直接复制shadowsocks-libev/debian/shadowsocks-libev.service到系统目录下.
    1
    2
    3
    4
    5
    6
    7
    8
    9
    10
    11
    12
    13
    14
    15
    16
    17
    18
    19
    20
    21
    22
    23
    24
    ~$ sudo cp shadowsocks-libev/debian/shadowsocks-libev.default /etc/default/shadowsocks-libev
    ~$ sudo cat > '/etc/systemd/system/shadowsocks-libev.service' < EOF
    [Unit]
    Description=Shadowsocks-libev Default Server Service
    Documentation=man:shadowsocks-libev(8)
    After=network-online.target

    [Service]
    Type=simple
    CapabilityBoundingSet=CAP_NET_BIND_SERVICE
    AmbientCapabilities=CAP_NET_BIND_SERVICE
    EnvironmentFile=/etc/default/shadowsocks-libev
    User=nobody
    Group=nogroup
    LimitNOFILE=32768
    ExecStart=/usr/local/bin/ss-server -c $CONFFILE $DAEMON_ARGS

    [Install]
    WantedBy=multi-user.target
    EOF

    ~$ sudo systemctl daemon-reload
    ~$ sudo systemctl start shadowsocks-libev

插件部分

使用Docker安装

Dokku安装

  • 这里为什么要用Dokku?本来一个Dockfile直接用Docker就可以,但是关于trojan要用到letscrypt证书的问题,这里还是使用Dokku来完成它.
1
2
~$ wget https://raw.githubusercontent.com/dokku/dokku/v0.21.4/bootstrap.sh;
~$ sudo DOKKU_TAG=v0.21.4 bash bootstrap.sh

安装Brook

  • 它可能是目前最灵活,但同时又保持了较高易用性的架设方法.支持多协议多模式,跨平台也比其它技术好.它是用GO语言写的,这里也是不想从源码编译,直接去下载一个最新使用.下面会是一些使用示例,最完整的还参考它的Wiki,安装(install-cli)参考

  • 服务端

1
~$ ./brook server -l :8118 -p passwd1
  • 客户端
1
~# ./brook client -l 127.0.0.1:4444 -i 127.0.0.1 -s <serverip>:8118 -p passwd1

使用systemd管理

  • 创建如下文件,服务端与客户端类似,如果要在systemd内监听小于1024的端口,需要开启CapabilityBoundingSet=CAP_NET_BIND_SERVICE,AmbientCapabilities=CAP_NET_BIND_SERVICE两项.

    1
    2
    3
    4
    5
    6
    7
    8
    9
    10
    11
    12
    13
    14
    15
    16
    17
    18
    19
    20
    21
    22
    23
    ~$ cat /etc/systemd/system/brook.service
    [Unit]
    Description=Brook service
    Documentation=https://github.com/txthinking/brook
    After=network.target network-online.target nss-lookup.target

    [Service]
    ExecStart=/usr/bin/brook $DAEMON_ARGS
    CapabilityBoundingSet=CAP_NET_BIND_SERVICE
    AmbientCapabilities=CAP_NET_BIND_SERVICE
    Restart=always
    RestartSec=10
    StandardOutput=syslog
    StandardError=syslog
    SyslogIdentifier=brook
    EnvironmentFile=/etc/default/brook
    User=nobody
    Group=nogroup
    LimitNOFILE=500000
    LimitNPROC=500000

    [Install]
    WantedBy=multi-user.target
  • 环境参数文件

    1
    2
    3
    4
    5
    6
    7
    8
    9
    10
    11
    12
    13
    14
    15
    16
    17
    18
    19
    20
    21
    22
    23
    24
    25
    26
    ~$ cat>/etc/default/brook<<EOF
    # brook Upstart and SysVinit configuration file

    #
    # THIS FILE DOES NOT APPLY TO SYSTEMD
    #
    # Please see the documentation for "systemd drop-ins":
    # https://docs.docker.com/engine/admin/systemd/
    #


    # Use brook --help to modify the daemon startup options.
    # Extra command line arguments

    DAEMON_ARGS='client -s <your service>:443 --socks5 127.0.0.1:1080 -p <your password>'
    # Enable during startup?
    START=yes


    # User and group to run the server as
    USER=nobody
    GROUP=nogroup

    # Number of maximum file descriptors
    MAXFD=32768
    EOF
1
2
3
~$ sudo systemctl enable brook
~$ sudo systemctl start brook
~$ sudo systemctl status brook

FRP服务

编译源码

1
2
3
4
5
6
7
8
~$ git clone https://github.com/fatedier/frp
~$ cd frp && make
~$ tree bin/
bin/
├── frpc
└── frps

0 directories, 2 files

使用docker运行

1
2
3
4
5
6
7
8
9
10
11
12
13
14
15
16
17
18
19
20
21
22
23
24
25
26
27
28
29
30
31
32
33
34
35
36
37
FROM golang:1.17 AS builder
RUN go version

ARG upx_version=3.96
ARG GOPROXY

RUN go env -w GO111MODULE=on
RUN go env -w GOPROXY=https://goproxy.io,direct

COPY . /go/src/github.com/xindalcy/frp
WORKDIR /go/src/github.com/xindalcy/frp
#RUN set -x && \
# go get github.com/golang/dep/cmd/dep && \
# dep ensure -v

RUN CGO_ENABLED=0 GOOS=linux GOARCH=amd64 go build -a -ldflags="-w -s" -o bin/frps ./cmd/frps

SHELL ["/bin/bash", "-o", "pipefail", "-c"]
# hadolint ignore=DL3008
RUN apt-get update && apt-get install -y --no-install-recommends xz-utils && \
curl -Ls https://github.com/upx/upx/releases/download/v${upx_version}/upx-${upx_version}-amd64_linux.tar.xz -o - | tar xvJf - -C /tmp && \
cp /tmp/upx-${upx_version}-amd64_linux/upx /usr/local/bin/ && \
chmod +x /usr/local/bin/upx

RUN /usr/local/bin/upx -9 /go/src/github.com/xindalcy/frp/bin/frps

FROM scratch
COPY --from=builder /go/src/github.com/xindalcy/frp/bin/frps /go/bin/frps

EXPOSE 7001/tcp
EXPOSE 7500/tcp
EXPOSE 7001/udp
EXPOSE 7002/udp

VOLUME /etc/frp/

ENTRYPOINT ["/go/bin/frps","-c","/etc/frp/frps.ini"]

服务端配置

1
2
3
4
5
6
7
8
9
10
11
12
13
14
15
16
17
18
~$ cat /etc/frps.ini
[common]
bind_port = 7001
bind_udp_port = 7002
kcp_bind_port = 7001
authentication_method = token
token = 1122aabbcc # 建议使用 xxd -l 16 -p /dev/random
tcp_mux = true
protocol = kcp # 这
udp_packet_size = 1500

# dashboard 很简单,没有什么可以看的.
dashboard_port = 7500
# dashboard's username and password are both optional
dashboard_user = admin
dashboard_pwd = admin

~$ frps -c /etc/frps.ini

加入Systemed服务

1
2
3
4
5
6
7
8
9
10
11
12
13
14
15
16
17
18
19
20
21
22
23
~$ cat /etc/systemd/system/frps.service
[Unit]
Description=frps service
Documentation=https://github.com/fatedier/frp
After=network.target network-online.target nss-lookup.target

[Service]
ExecStart=/usr/bin/frps -c /etc/frps.ini
CapabilityBoundingSet=CAP_NET_BIND_SERVICE
AmbientCapabilities=CAP_NET_BIND_SERVICE
Restart=always
RestartSec=10
StandardOutput=syslog
StandardError=syslog
SyslogIdentifier=frps
User=nobody
Group=nogroup
LimitNOFILE=500000
LimitNPROC=500000

[Install]
WantedBy=multi-user.target

被控端

P2P Mode

*xtcpis designed for transmitting large amounts of data directly between clients. A frps server is still needed, as P2P here only refers the actual data transmission.

1
2
3
4
5
6
7
8
9
10
11
12
13
14
15
16
17
18
19
20
21
22
23
24
25
26
27
28
29
30
31
32
33
34
35
36
37
38
39
40
41
42
43
44
45
46
47
48
49
50
51
~$ cat .config/frpc.ini
# frpc.ini
[common]
server_addr = <your server address>
server_port = 7001
token = 1122aabbcc # 与服务器一致.

# 可以使用自签名的证书
# tls_enable = true
# tls_only = true
# tls_cert_file = /etc/frp/tls/client.crt
# tls_key_file = /etc/frp/tls/client.key
# tls_trusted_ca_file = /etc/frp/tls/ca.crt

# 如果是使用kcp协议, server_port必须是服务器指定的kcp_bind_port.
# protocol = kcp
# server_port = 7011


# 本地SSH服务
[build_ssh]
type = xtcp
sk = aabbcc123 # 访问该服务的认证密钥.
local_ip = 127.0.0.1
local_port = 22
# 加密压缩可以选,如果要加,必须两端一致.
use_encryption = true
use_compression = true


#本地spice服务,类似VNC
[osx]
type = xtcp
sk = aabbcc123
local_ip = 127.0.0.1
local_port = 5930

#本地spice服务,类似VNC
[win10]
type = xtcp
sk = aabbcc123
local_ip = 127.0.0.1
local_port = 5940

[zkfd]
type = xtcp
sk = aabbcc123
local_ip = 127.0.0.1
local_port = 5980

  • 运行

    1
    2
    3
    4
    5
    6
    2021/06/04 23:17:52 [I] [service.go:304] [294f53354ddf974b] login to server success, get run id [294f53354ddf974b], server udp port [7002]
    2021/06/04 23:17:52 [I] [proxy_manager.go:144] [294f53354ddf974b] proxy added: [win10 zkfd jenkins build_ssh osx]
    2021/06/04 23:17:52 [I] [control.go:180] [294f53354ddf974b] [build_ssh] start proxy success
    2021/06/04 23:17:52 [I] [control.go:180] [294f53354ddf974b] [win10] start proxy success
    2021/06/04 23:17:52 [I] [control.go:180] [294f53354ddf974b] [zkfd] start proxy success
    2021/06/04 23:17:52 [I] [control.go:180] [294f53354ddf974b] [osx] start proxy success
  • 或者命令行的方式

    1
    2
    ~$ frpc xtcp --sk aabbcc123 -s <your server address>:7001 --proxy_name osx --uc --ue --local_ip 127.0.0.1 --local_port 5901   -t 1122aabbcc

控制端

1
2
3
4
5
6
7
8
9
10
11
12
13
14
15
16
17
18
19
20
21
22
23
24
25
26
27
28
29
30
31
32
33
34
35
36
37
38
39
40
41
42
43
44
45
46
47
48
49
50
cat .config/frpc.ini
[common]
server_addr = <your server address>
server_port = 7001
token = 1122aabbcc # 与服务器一致.


[p2p_ssh_visitor]
type = xtcp
role = visitor
server_name = secret_ssh
sk = aabbcc123
bind_addr = 127.0.0.1
bind_port = 23222
use_encryption = true
use_compression = true


[build_visitor]
type = xtcp
role = visitor
server_name = build_ssh
sk = aabbcc123
bind_addr = 127.0.0.1
bind_port = 5122

[win10_visitor]
type = xtcp
role = visitor
server_name = win10
sk = aabbcc123
bind_addr = 127.0.0.1
bind_port = 5940

[zkfd_visitor]
type = xtcp
role = visitor
server_name = zkfd
sk = aabbcc123
bind_addr = 127.0.0.1
bind_port = 5980

[osx_visitor]
type = xtcp
role = visitor
server_name = mac
sk = aabbcc123
bind_addr = 127.0.0.1
bind_port = 5930

  • 控制端运行

    1
    2
    3
    4
    5
    6
    7
    8
    2021/06/07 21:30:13 [I] [service.go:304] [b6d7adb82bbcd374] login to server success, get run id [b6d7adb82bbcd374], server udp port [7002]
    2021/06/07 21:30:13 [I] [visitor_manager.go:86] [b6d7adb82bbcd374] start visitor success
    2021/06/07 21:30:13 [I] [visitor_manager.go:86] [b6d7adb82bbcd374] start visitor success
    2021/06/07 21:30:13 [I] [visitor_manager.go:86] [b6d7adb82bbcd374] start visitor success
    2021/06/07 21:30:13 [I] [visitor_manager.go:86] [b6d7adb82bbcd374] start visitor success
    2021/06/07 21:30:13 [I] [visitor_manager.go:86] [b6d7adb82bbcd374] start visitor success
    2021/06/07 21:30:13 [I] [visitor_manager.go:86] [b6d7adb82bbcd374] start visitor success

  • 命令行运行.

    1
    ~$ frpc xtcp --role visitor --server_name osx --sk aabbcc123 -s <your server address>:7001 --uc --ue --bind_addr 127.0.0.1  --bind_port 6900  -t 1122aabbcc
  • 在本机或者局域网内运行控制端后,就可以通过它去连接的服务器上的服务了.如:连接到p2p_ssh_visitor,直接ssh user@127.0.0.1 -p 23222.
    *frp本身支持直接暴露HTTP web服务,如果只内网的一些私用的web服务,也可以在frp的代理下,再进行一次SSH本地代理转发,下面是通过SSH -L把对端局域内的某一个8080服务转发本地的8080,如:

1
~$ ssh -L 8080:172.17.0.56:8080 user@127.0.0.1 -p 23222 -fNTC

TLS加密通信

1
2
3
4
5
6
7
8
9
10
11
12
13
14
15
16
17
18
19
20
21
22
23
24
25
26
27
28
29
30
31
32
33
34
35
36
37
38
39
40
41
42
43
44
45
46
47
48
49
50
51
52
53
54
55
56
57
58
59
60
61
62
63
64
65
66
67
68
69
70
71
72
73
74
75
76
77
78
79
80
81
82
83
84
85
86
87
88
89
~$ cat generate_cs_cert.sh
#!/bin/bash

#
# If you using frp via IP address and not hostname, make sure to set the appropriate IP address in the Subject Alternative Name (SAN) area when generating SSL/TLS Certificates.

ETH0_IPv4=`ip addr show dev eth0 | grep "inet" | head -n1 | awk '{print $2}' | awk -F '/' '{print $1}'`
DOMAIN=`dig -x ${ETH0_IPv4} | grep "PTR" | grep -v '^;' | awk '{print $5}'`

export TLS_DIR=$1
[ ! -d $TLS_DIR ] && mkdir $TLS_DIR && cd $TLS_DIR

cat > my-openssl.cnf << EOF
[ ca ]
default_ca = CA_default
[ CA_default ]
x509_extensions = usr_cert
[ req ]
default_bits = 2048
default_md = sha256
default_keyfile = privkey.pem
distinguished_name = req_distinguished_name
attributes = req_attributes
x509_extensions = v3_ca
string_mask = utf8only
prompt = no
[ req_distinguished_name ]
C = US
ST = VA
L = SomeCity
O = MyCompany
OU = MyDivision
CN = ${DOMAIN}
[ req_attributes ]
[ usr_cert ]
basicConstraints = CA:FALSE
nsComment = "OpenSSL Generated Certificate"
subjectKeyIdentifier = hash
authorityKeyIdentifier = keyid,issuer
[ v3_ca ]
subjectKeyIdentifier = hash
authorityKeyIdentifier = keyid:always,issuer
basicConstraints = CA:true
EOF


# build ca certificates

echo "---> build ca certificates"
openssl genrsa -out ca.key 2048
openssl req -x509 -new -nodes -key ca.key -subj "/CN=${DOMAIN}" -days 5000 -out ca.crt


# build frps server side certificates

echo "---> build frps server side certificates"
openssl genrsa -out server.key 2048

openssl req -new -sha256 -key server.key -out server.csr -config my-openssl.cnf

openssl x509 -req -days 365 \
-in server.csr -CA ca.crt -CAkey ca.key -CAcreateserial \
-extfile <(printf "subjectAltName=IP:${ETH0_IPv4}") \
-out server.crt

# build frpc client side certificates

echo "---> build frpc client side certificates"

openssl genrsa -out client.key 2048
openssl req -new -sha256 -key client.key -out client.csr -config my-openssl.cnf

openssl x509 -req -days 365 \
-in client.csr -CA ca.crt -CAkey ca.key -CAcreateserial \
-extfile <(printf "subjectAltName=IP:${ETH0_IPv4}") \
-out client.crt


# verify the server certificate:

openssl verify -CAfile ca.crt server.crt
ca.crt: OK
server.crt: OK

# verify the client certificate:
openssl verify -CAfile ca.crt client.crt
ca.crt: OK
client.crt: OK

测试证书

1
2
3
~$ openssl s_server -cert server.crt -key server.key -accept 1443 -www
Using default temp DH parameters
ACCEPT
  • 可以使用浏览器打开,也可以使用下面命令测试
    1
    2
    3
    4
    5
    6
    7
    8
    9
    10
    11
    12
    13
    14
    15
    openssl s_client -connect localhost:1443
    CONNECTED(00000003)
    Can't use SSL_get_servername
    depth=0 C = US, ST = VA, L = SomeCity, O = MyCompany, OU = MyDivision, CN = 66.228.37.43
    verify error:num=20:unable to get local issuer certificate
    verify return:1
    depth=0 C = US, ST = VA, L = SomeCity, O = MyCompany, OU = MyDivision, CN = 66.228.37.43
    verify error:num=21:unable to verify the first certificate
    verify return:1
    ---
    Certificate chain
    0 s:C = US, ST = VA, L = SomeCity, O = MyCompany, OU = MyDivision, CN = 66.228.37.43
    i:CN = 66.228.37.43
    ---
    [...]

服务端证书配置

1
2
3
4
5
6
7
[common]
tls_enable = true
tls_only = true
tls_cert_file = /etc/frp/tls/server.crt
tls_key_file = /etc/frp/tls/server.key
tls_trusted_ca_file = /etc/frp/tls/ca.crt
[...]

客户端证书配置

1
2
3
4
5
6
7
8
9
10
[common]
server_addr = <your SAN address>

tls_enable = true
tls_cert_file = /etc/frp/tls/client.crt
tls_key_file = /etc/frp/tls/client.key
tls_trusted_ca_file = /etc/frp/tls/ca.crt
[...]

~$ sudo chown nobody:nogroup -R /etc/frp/tls
  • 注意,如果开始TLS后,[common] -> server_addr就必须是证书里的SAN,不要使用/etc/hosts里的映射,否则会报如下:
1
2
3
2021/06/13 23:58:22 [W] [service.go:104] login to server failed: x509: certificate is not valid for any names, but wanted to match xxx
x509: certificate is not valid for any names, but wanted to match xxx

使用Cloudflare Warp原生IP

Install cloudflare-warp Client

  • First, install the repository’s GPG key:

    1
    curl https://pkg.cloudflareclient.com/pubkey.gpg | sudo gpg --yes --dearmor --output /usr/share/keyrings/cloudflare-warp-archive-keyring.gpg
  • Then add the repository to your machine’s apt sources:

1
2
3
4
echo "deb [arch=amd64 signed-by=/usr/share/keyrings/cloudflare-warp-archive-keyring.gpg] https://pkg.cloudflareclient.com/ $(lsb_release -cs) main" | sudo tee /etc/apt/sources.list.d/cloudflare-client.list

~$ apt-get update -y
~$ apt-get install cloudlare-warp -y

Configure WARP

  • If you are first install, your need register an account before using it. That register information will store at /var/lib/cloudflare-warp/reg.json.
1
2
~$ wrap-cli register

  • And then set the proxy mode, this step is very important because the default mode is WARP mode, that will bring your whole VPS into the the cloudflare VPN Network,and then you will lose the connection with your VPS.
1
2
~$ warp-cli set-mode proxy
~$ warp-cli enable-always-on
  • After that, you can use wrap-cli settings to view your configuration.You can also check the the configration to determine if it was success configured. configure file store at /var/lib/cloudflare-warp/settings.json.

Connection to WARP and then verify it

1
2
3
4
~$ warp-cli connect
~$ warp-cli status
Status update: Connected
Success
  • When the connection is successful, your system will have a “Socks5” proxy daemon which listens to “127.0.0.1:40000”, you can use the following command to check if WARP is proxied successfully.
1
2
3
4
5
6
7
8
9
10
11
12
~$ curl -x "socks5://127.0.0.1:40000" ipinfo.io
{
"ip": "1x4.28.2x9.x17",
"city": "Atlanta",
"region": "Georgia",
"country": "US",
"loc": "13.7490,-84.3880",
"org": "AS13x35 Cloudflare, Inc.",
"postal": "30302",
"timezone": "America/New_York",
"readme": "https://ipinfo.io/missingauth"
}
  • If you saw the kind of text output like above, it’s indicates that WARP configure right and work fine. However, if you see some of warnings during connection, such as the following WARP warning.
1
2
~$ warp-cli connect
Status update: Unable to connect. Reason: Insufficient system resource: file descriptor
  • You should edit the /lib/systemd/system/warp-svc.service like the following:
1
2
3
[Service]
LimitNOFILE=65535
LimitNOFILESoft=65535

customize v2ray route

  • The following configuration enables some domains or IP addresses to pass through the WARP proxy.
1
2
3
4
5
6
7
8
9
10
11
12
13
14
15
16
17
18
19
20
21
22
23
24
25
26
27
28
29
30
31
32
33
34
35
36
37
38
39
40
41
42
43
44
45
46
47
48
49
50
51
52
53
54
55
56
57
58
59
60
61
62
63
64
65
66
67
68
69
70
71
72
73
74
75
76
77
78
79
{
...
"outbounds": [
{
"protocol": "freedom",
"tag": "direct",
"settings": {}
},
{
"tag": "warp",
"protocol": "socks",
"settings": {
"servers": [
{
"address": "127.0.0.1",
"ota": false,
"port": 40000,
"level": 1
}
]
},
"streamSettings": {
"network": "tcp"
},
"mux": {
"enabled": false,
"concurrency": -1
}
},
{
"protocol": "blackhole",
"settings": {},
"tag": "blocked"
}
],
"routing": {
"rules": [
{
"type": "field",
"ip": [
"geoip:private"
],
"outboundTag": "blocked"
},
{
"type": "field",
"outboundTag": "warp",
"domain": [
"geosite:netflix",
"geosite:openai",
"ipinfo.io",
"openai.com",
"disneyplus.com",
"bing.com"
]
},
{
"type": "field",
"domain": [
"geosite:cn"
],
"outboundTag": "warp"
},
{
"type": "field",
"ip": [
"geoip:cn"
],
"outboundTag": "warp"
},
{
"type": "field",
"outboundTag": "direct",
"network": "udp,tcp"
}
]
}
}

  • As you can see at above "openai.com","disneyplus.com",... will go through the WARP proxy.

联系作者